If you think exoplanet detections are only in the realm of professional planet-hunting telescopes such as Kepler, take a look at the video above. David Schneider, a senior editor for IEEE Spectrum, explains that it takes little more than a DSLR camera and a camera lens to catch a glimpse.
Schneider told Universe Today that he’s not an experienced amateur observer, nor should his equipment be expected to detect new exoplanets. But the potential for the future is interesting, he explained.
“I was simply trying to detect the signature of a known exoplanet, one that was discovered years ago with far more sophisticated gear,” he wrote in an e-mail. “I knew exactly which star to look at, when the transit occurs, and what the change in brightness would be. I relied on the expertise of professional astronomers to provide all that information.”
Here’s the setup: a Canon EOS Rebel XS DSLR, a 300-millimeter Nikon telephoto lens, an adapter to get the Nikon talking to the Canon, and a self-built “barn door tracker” that he constructed based on descriptions he found on the web. (His IEEE Spectrum article has more details.)
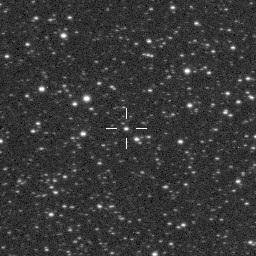
Schneider chose HD 189733, whose hostile-to-life “deep blue” exoplanet is about 63 light-years away and transits the face of the star every 2.2 days. But often these transits take place at inconvenient times (such as during the day, and the star is low on the horizon). He also faced several cloudy nights, meaning it was several weeks until he could take the imagery.
Once that was finished, Schneider ran the pictures through a piece of astronomical imaging software called Iris. In Schneider’s words, this is how the software helped him pick out the planet:
At the most basic level, Iris allows you to perform the corrections that are customary for really all types of digital astrophotography. In particular, you correct for ‘hot pixels’ in your camera sensor and for variations in the sensitivity of the sensor across the frame. This is standard stuff in astrophotography, requiring that you take images with the lens cap on (so-called “darks”), of a uniformly illuminated background (“flats”), and so forth.
For this project, you also need to use the tools that Iris provides to do what’s called aperture photometry. In a nutshell, you have to adjust the registration of the set of images you collect so that the stars are in the same position in each image. Then you have to set up things in Iris to do photometric measurements of a selected set of stars in one frame. After that, Iris will perform the photometry you want on the whole set of images you have in an automated fashion.
While his equipment isn’t sophisticated enough to account for “false positives” such as a sunspot going across a star — amateurs are more at the stage of confirming professional observations — Schneider pointed out there are many similar projects to his own. Among them are KELT-NORTH (which inspired his search), Evryscope, and this group at the University of Arizona.
“My project merely highlights that you can get your feet wet in this area with some really cheap hardware,” Schneider said. He recommends those that want to do similar work to his read the IEEE Spectrum article, buy the hardware required, read up on astrophotography and Iris, and not be afraid to experiment.
Schneider added he wasn’t trying to do “anything special” — many amateurs have encountered similar success — but he had a lot of fun. “Maybe because I’m a bit of a computer nerd, I found digital astrophotography to be a lot more enjoyable than actually looking through a telescope, which in the few times I’ve done that often involved a lot of squinting and unpleasant vibration.”


