Binoculars for Astronomy

Astronomy is best when you get outside and look into the skies with your own eyes. And the best way to get started is with a set of binoculars for astronomy. They’re light, durable, easy to use, and allow you to see objects in the night sky that you just couldn’t see with your own eyes. There are so many kinds of binoculars out there, so we’ve put together this comprehensive guide to help you out.

Everyone should own a pair of binoculars. Whether you’re interested in practicing serious binocular astronomy or just want a casual cosmic close-up, these portable “twin telescopes” are both convenient and affordable. Learning more about how binoculars work and what type of binoculars work best for astronomy applications will make you much happier with your selection. The best thing to do is start by learning some binocular “basics”.

What are binoculars and how do they work?
Binoculars are both technical and simple at the same time. They consist of an objective lens (the large lens at the far end of the binocular), the ocular lens (the eyepiece) and a prism (a light reflecting, triangular sectioned block of glass with polished edges).

The prism folds the light path and allows the body to be far shorter than a telescope. It also flips the image around so it doesn’t look upside-down. The traditional Z-shaped porro prism design is well suited to astronomy and consists of two joined right-angled prisms which reflects the light path 3 times. The sleeker, straight barrelled roof prism models are more compact and far more technical. The light path is longer, folding 4 times and requires stringent manufacturing quality to equal the performance. These models are better suited to terrestrial subjects, and are strongly not recommended for astronomy use.

If you’re using binoculars for astronomy, go with a porro prism design.

Choosing the Lens Size
Every pair of binoculars will have a pair of numbers associated with it: the magnifying power times (X) the objective lens size. For example, a popular ratio is 7X35. For astronomical applications, these two numbers play an important role in determining the exit pupil – the amount of light the human eye can accept (5-7mm depending on age from older to younger). By dividing the objective lens (or aperture) size by the magnifying power you can determine a pair of binoculars exit pupil.

Like a telescope, the larger the aperture, the more light gathering power – increasing proportionately in bulk and weight. Stereoscopic views of the night sky through big binoculars is an incredible, dimensional experience and one quite worthy of a mount and tripod! As you journey through the binocular department, go armed with the knowledge of how to choose your binoculars lens size.

Why does the binocular lens size matter? Because binoculars truly are a twin set of refracting telescopes, the size of the objective (or primary) lens is referred to as the aperture. Just as with a telescope, the aperture is the light gathering source and this plays a key role in the applications binoculars are suited for. Theoretically, more aperture means brighter and better resolved images – yet the size and bulk increases proportionately. To be happiest with your choice, you must ask yourself what you’ll be viewing most often with your new binoculars. Let’s take a look at some general uses for astronomy binoculars by their aperture.

Different Sizes of Binoculars
Binoculars with a lens size of less that 30mm, such as 5X25 or 5X30, are small and very portable. The compact models can fit easily into a pocket or backpack and are very convenient for a quick look at well-lit situations. In this size range, low magnifications are necessary to keep the image bright.

Compact models are also great binoculars for very small children. If you’re interested in choosing binoculars for a child, any of these models are very acceptable – just keep in mind a few considerations. Children are naturally curious, so limiting them to only small binoculars may take away some of the joy of learning. After all, imagine the thrill of watching a raccoon in its natural habitat at sundown… Or following a comet! Choose binoculars for a child by the size they can handle, whether the model will fold correctly to fit their interpupilary size, and durability. Older children are quite capable of using adult-sized models and are naturals with tripod and monopod arrangements. For less than the price of most toys, you can put a set of quality optics into their hands and open the door to learning. Children as young as 3 or 4 years old can handle 5X30 models easily and enjoy wildlife and stargazing both!

Binocular aperture of up to 40mm is a great mid-range size that can be used by almost everyone for multiple applications. In this range, higher magnification becomes a little more practical. For those who enjoy stargazing, this is an entry level aperture that is very acceptable to study the Moon and brighter deep sky objects and they make wonderful binoculars for older children.

Binoculars up to 50-60mm in lens size are also considered mid-range, but far heavier. Again, increasing the objective lens size means brighter images in low light situations – but these models are a bit more bulky. They are very well suited to astronomy, but the larger models may require a support (tripod, monopod, car window mount) for extended viewing. Capable of much higher magnification, these larger binocular models will seriously help to pick up distant, dimmer subjects such as views of distant nebulae, galaxies and star clusters. The 50mm size is fantastic for older children who are ready for more expensive optics, but there are drawbacks.

The 50-60mm binoculars are pushing the maximum amount of weight that can be held comfortably by the user without assistance, but don’t rule them out. Available in a wide range of magnifications, these models are for serious study and will give crisp, bright images. Delicate star clusters, bright galaxies, the Moon and planets are easily distinguishable in this aperture size. These models make for great “leave in the car” telescopes so you always have optics at hand. For teens who are interested in astronomy, binoculars make an incredible “First Telescope”. Considering a model in this size will allow for most types of astronomical viewing and with care will last through a lifetime of use.

Binoculars any larger than 50-60mm are some serious aperture. These are the perfect size allowing for bright images at high magnification. For astronomy applications, binoculars with equations like 15X70 or 20X80 are definitely going to open a whole new vista to your observing nights. The wide field of view allows for a panoramic look at the heavens, including extended comet tails, large open clusters such as Collinder Objects, starry fields around galaxies, nebulae and more… If you have never experienced binocular astronomy, you’ll be thrilled at how easy objects are to locate and the speed and comfort at which you can observe. A whole new experience is waiting for you!

Binocular Magnification
When choosing binoculars for astronomy, just keep in mind that all binoculars are expressed in two equations – the magnifying power X the objective lens size. So far we have only looked at the objective lens size. Like a telescope, the larger the aperture, the more light gathering power – increasing proportionately in bulk and weight. Stereoscopic views of the night sky through big binoculars is an incredible, dimensional experience, but for astronomical applications we need these two numbers to play an important role in determining the exit pupil – the amount of light the human eye can accept. By dividing the objective lens (or aperture) size by the magnifying power you can determine a pair of binoculars exit pupil. Let’s take a look at why that’s important.

How do binoculars magnify? What’s the best magnification to use? What magnifying power do I choose for astronomy? Where do I learn about what magnifying power is best in binoculars? Because binoculars are a set of twin refracting telescopes meant to be used by both eyes simultaneously, we need to understand how our eyes function. All human eyes are unique, so we need to take a few things into consideration when looking at the astronomy binocular magnification equation.

By dividing the objective lens (or aperture) size by the magnifying power you can determine a pair of binoculars exit pupil and match it to your eyes. During the daylight, the human eye has about 2mm of exit pupil – which makes high magnification practical. In low light or stargazing, the exit pupil needs to be more around 5 to be usable.

While it would be tempting to use as much magnification as possible, all binoculars (and the human eye) have practical limits. You must consider eye relief – the amount of distance your eye must be away from the secondary lens to achieve focus. Many high “powered” binoculars do not have enough outward travel for eye glass wearers to come to focus without your glasses. Anything less than 9mm eye relief will make for some very uncomfortable viewing. If you wear eyeglasses to correct astigmatism, you may wish to leave your glasses on while using binoculars, so look for models which carry about 15mm eye relief.

Now, let’s talk about what you see! If you look through binoculars of two widely different magnifying powers at the same object, you’ll see you have the choice of a small, bright, crisp image or a big, blurry, dimmer image – but why? Binoculars can only gather a fixed amount of light determined by their aperture (lens size). When using high magnification, you’re only spreading the same light over a larger area and even the best binoculars can only deliver a certain amount of detail. Being able to steady the view also plays a critical role. At maximum magnification, any movement will be exaggerated in the viewing field. For example, seeing craters on the Moon is a tremendous experience – if only you could hold the view still long enough to identify which one it is! Magnification also decreases the amount of light that reaches the eye. For these reasons, we must consider the next step – choosing the binocular magnification – carefully.

Binoculars with 7X magnifying power or less, such as 7X35, not only delivers long eye relief, but also allows for variable eye relief that is customizable to the user’s own eyes and eyeglasses. Better models have a central focus mechanism with a right eye diopter control to correct for normal right/left eye vision imbalance. This magnification range is great for most astronomy applications. Low power means less “shake” is noticed. Binoculars with 8X or 9X magnification also offer long eye relief, and allows comfort for eyeglass wearers as well as those with uncorrected vision. With just a bit more magnification, they compliment astronomy. Binoculars 10 x 50 magnifying power are a category of their own. They are at the edge of multipurpose eye relief and magnifying power at this level is excellent across all subject matter. However, larger aperture is recommended for locating faint astronomy subjects.

Binoculars with 12-15X magnifying power offer almost telescopic views. In astronomy applications, aperture with high magnification is a must to deliver bright images. Some models are extremely well suited to binocular astronomy with a generous exit pupil and aperture combined. Binoculars with 16X magnification and higher are on the outside edge of high magnification at hand-held capabilities. They are truly designed exclusively as mounted astronomical binoculars. Most have excellent eye relief, but when combined with aperture size, a tripod or monopod is suggested for steady viewing. If you’re interested in varying the power, you might want to consider zoom binoculars. These allow for a variety of applications that aren’t dependent solely on a single feature. Models can range anywhere from as low as 5X magnification up to 30X, but always bear in mind the higher the magnification – the dimmer the image. Large aperture would make for great astronomy applications when a quick, more magnified view is desired without being chained to a tripod.

Other Binocular Features
The next thing to do is take a good look at the binoculars you are about to purchase. Check out the lenses in the light. Do you see blue, green, or red? Almost binoculars have anti-reflection coatings on their air to glass surfaces, but not all are created equal. Coatings on binocular lenses were meant to assist light transmission of the object you’re focusing on and cancelling ambient light. Simply “coated” in the description means they probably only have this special assistance on the first and last lens elements – the ones you’re looking at. The same can also be said of the term “multi-coated”, it’s probably just the exterior lens surface, but at least there’s more than one layer! “Fully coated” means all the air-to-glass surfaces are coated, which is better… and “fully multi-coated” is best. Keeping stray light from bouncing around and spoiling the light you want to see is very important, but beware ruby coated lenses… These were meant for bright daylight applications and will rob astronomical binoculars of the light they seek.

Last, but not least, is a scary word – collimation. Don’t be afraid of it. It only means the the optics and the mechanics are properly aligned. Most cheap binoculars suffer from poor collimation, but that doesn’t mean you can’t find an inexpensive pair of binoculars that are well collimated. How can you tell? Take a look through them with both eyes. If you can’t focus at long distance, short distance and a distance in-between, there is something wrong. If you can’t close either eye and come to focus with the other, there’s something wrong. Using poorly collimated binoculars for any length of time causes eye strain you won’t soon forget.

Price range for Astronomy Binoculars
So, how much? What does a good pair of binoculars for astronomy cost? First look for a quality manufacturer. Just because you’ve chosen a good name doesn’t mean you’re draining your pocket. Smaller astronomy binoculars of high quality are usually around or under $25. Mid-sized astronomy binoculars range from $50 to $75 as a rule. Large astronomy binoculars can run from a little over $100 to several hundred dollars. Of course, choosing a high-end pair of binoculars of any size will cost more, but with proper care they can be handed down through generations of users. Keep in mind little things that might be good for your applications, like rubber-coated binoculars for children who bang them around more, or fog-proof lenses if you live in a high humidity area. Cases, lens caps and neck straps are important, too.

Some Suggested Binoculars
The purpose of this guide was to help you understand how to choose the best binoculars for astronomy. But if you trust me, and just want some suggestions… here you go.

For all purpose astronomy binoculars, I’d recommend the Celestron Up-Close and Ultima Series as well as Meade Travel View. Nikkon and Bushnell binoculars in this size range are an investment, and best undertaken after you decide if binocular astronomy and this size is right for you. Amazon.com offers a wide range of these binoculars.

While so much information on binoculars may seem a little confusing at first, just a little study will take you on your way to discovering astronomy binoculars that are perfect for you!

Universe Today Exclusive – Cygnus Nova V2491 Revealed for Readers

Clouds got you down? No chance of seeing V2491 Cyg because of the weather? Are you sleeping when Cygnus is up? One of the most beautiful facets of having an astronomer around is being able to share information with other observatories around the world and put them to work. This time the job was handed to our friends in Australia who were able to produce for us an exclusive look at an elusive nova.

In trial test on image acquisition utilizing the combined resources of Macedon Ranges Observatory and its resident astronomers, they were able to nab the nova in less than 30 minutes from notice being given. The image was then processed, labeled and returned again halfway around the world within hours for UT readers to enjoy.

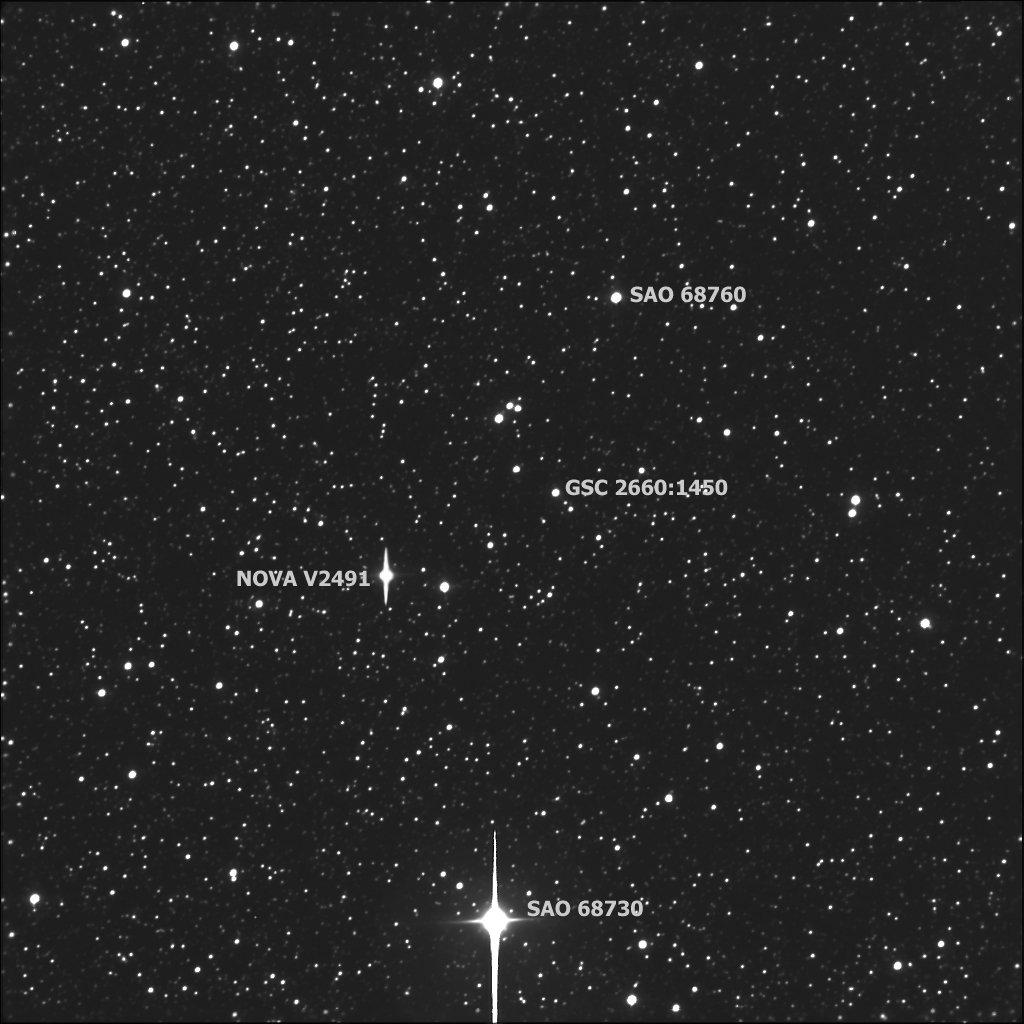
On 15 April 2008 from 10.50 to 11.40 UT, Joseph Brimacombe from Cairns, Queensland, Australia was busy employing remote technology located at 32 degrees 54 minutes North; 15 degrees 32 min West and recording the nova with an SBIG ST-L-1001 CCD camera. Coupled with a 20″ Ritchey-Chretien Optical System, 8 separate exposures of 5 minutes duration were taken in white light, and the results speak for themselves.

By comparing the zoom map of the area presented in the original Cygnus Nova Alert it’s easy to see the identifying line of three stars which helps orient the viewer to the general area. As predicted, Cygnus Nova V2491 easily stands out amongst the background stars.

Says Observatory Director, Burt Candusio: “The exercise was primarily designed to test the imaging and response capabilities of M.R.O resident astronomers. If another similar event presents itself, we would now be confident in our capabilities of imaging a target effectively and quickly from any part of the globe. A most pleasing outcome for all concerned and especially for Joseph Brimacombe.”

But the thrill was nothing compared to Joe’s own success: “Trapped under the mostly cloudy Cairns skies, I was remotely imaging the running chicken nebula (NGC 2944) at the Macedon Range Observatory and the Pinwheel galaxy (M101) at New Mexico Skies, when my good mate Bert Candusio notified me of a new nova (V2491) in Cygnus. At the time, it was 60 degrees below the horizon at the MRO, but 50 degrees above the horizon at NMS, so I slewed my 20 inch RCOS at NMS to the co-ordinates Bert had provided. There was just sufficient time before dawn to snap 8 x 5 min luminance frames of a dense star field. Both Bert and I were delighted to find the nova near the middle of the frame. We estimate the magnitude at around 10. The beauty of NGC 2944 and M101 was not a match for the excitement of imaging an acute stellar explosion for the first time!”

In the case of V2491 Cyg, the only thing better than having the stars up above is having friends down under. Our thanks go to our friends at Macedon Ranges Observatory!

Universe Today Astronomy Picture of the Week: NGC 3199 – The Interstellar Snow Plough

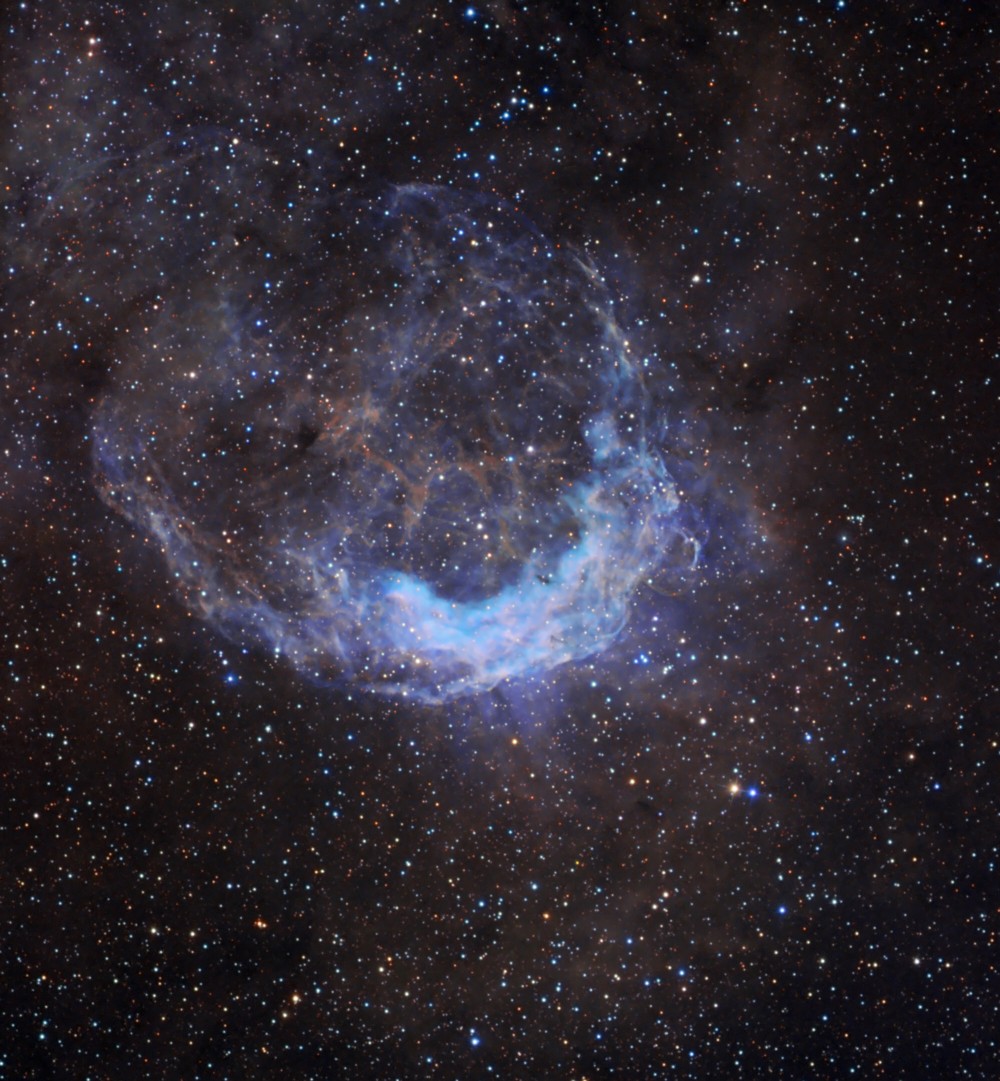
NGC 3199 - Credit: Ken Crawford

One thing is certain, Wolf-Rayet stars produce some interesting
science. In this week’s portrait we see a distorted bubble produced
by a moving star blowing a strong stellar wind into a surrounding
uniform interstellar medium – yet is isn’t uniform. What exactly is
going on here?

Hanging out some 11,736 light years away in the southern constellation
of Carina (RA 10:17:24.0 Dec -57:55:18), NGC 3199 is classed as a
diffuse nebula or supernova remnant. Discovered by John Herschel in
1834, it has been known throughout historic astronomy observations as
bright, large, crescent-shaped nebula with embedded stars, but modern
astronomy shows it as much more. It’s being pushed along by
Wolf-Rayet star 18.

Says Dr. Michael Corcoran: “Wolf-Rayet stars (named for their
discoverers) are very large, massive stars (stars which are about 20
times bigger than the sun) nearly at the end of their stellar lives.
As these stars age, material which the stars have cooked up in their
central nuclear furnaces (like carbon and oxygen) gradually reach the
surface of the star. When enough material reaches the surface, it
absorbs so much of the intense light from the star that an enormously
strong wind starts to blow from the star’s surface. This wind becomes
so thick that it totally obscures the star – so when we look at a
Wolf-Rayet star, we’re really just seeing this thick wind. The amount
of material which the wind carries away is very large – typically, a
mass equivalent to that of the entire earth is lost from the star each
year. The mass loss is so large that it significantly shortens the
star’s life, and as you can imagine has important effects on the space
surrounding the star too. We think that very massive stars become
Wolf-Rayet stars just before they explode as supernova (though no one
has yet seen such a star explode).

At magnitude 11, NGC 3199 is observable with larger amateur
telescopes, but the crescent shape is cause for study by some of the
finest research telescopes and astronomers in the world. Through
optical observations, the ring nebula and cavities around WF stars have
painted a history of mass loss in these highly evolved stellar
curiosities. By studying molecular gases associated with Wolf-Rayet
stars
, it appears that some materials seem to be avoiding optical
emission.

In reading scientific reports submitted by A. P. Marston, molecular
gas has already been observed around Wolf-Rayet Star 18 – the first to
confirm the presence of HCN, HCO+, CN, and HNC and molecules. This
makes the Wolf-Rayet ring nebula NGC 3199 very unique and filled
associated molecular gas that took the form clumpy ejecta and
interstellar material. At one time, NGC 3199’s formation was believed
to be caused by bow shock, but current data now shows the associated
Wolf Rayet star is moving at a right angle to its enveloping
environment. Could this be an indication that something else is at
work here? Astronomers seem to think so.

According to their information, it is possible the northern area of
the optically bright nebula is being torn apart by a possible blowout
of Wolf Rayet wind. This, in turn, affects the surrounding ejecta and
could very well account for the observed velocity. By modeling
molecular abundances, the central Wolf Rayet star could be contributing a
portion of its material to this nebula as ejecta. Despite its still
unsolved mysteries, NGC 3199 is a stunning portrait. J.E. Dyson and
Ghanbari summed it up best when they described it as an “interstellar
snow plough”.

This week’s awesome astronomy picture is the work of Ken Crawford, taken at Macedon Ranges Observatory.

Says Ken: “This image was taken using an Apogee CCD Camera that uses primarily Narrow Band data which is color mapped mixed with RGB for natural star colors and back ground balancing. The bright blue area shows lots of OIII (ionized oxygen) signal which really shows the direction of the star movement well. The star is said to be moving at about 60 km/s through the interstellar gas.”

Cygnus Nova Alert!!

Supernova (Artist Rendering: Courtesy of NASA)

According to today’s April 11 IAU Circular 8934, issued by the Central Bureau for Astronomical Telegrams at the Smithsonian Astrophysical Observatory in Cambridge, Massachusetts a 7th-magnitude nova was discovered on April 10, 2008, by Koichi Nishiyama and Fujio Kabashima in Japan. It’s time to observe!

NASA

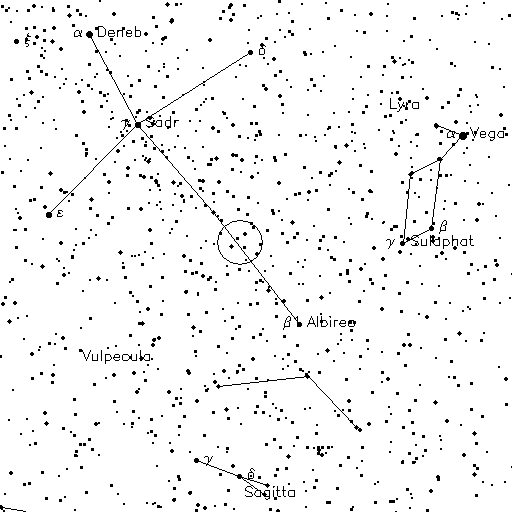
The event is located in Cygnus, about one-third of the way from Albireo (β Cygni) to Sadr (γ Cygni) – RA 19 43 0 Dec +32 19. From early reports, it may still be continuing to brighten. Ernesto Guido and Giovanni Sostero of Remanzacco, Italy confirmed the discovery before the IAU announcement was made and estimated the nova’s magnitude at 7.5 at approximate 09:00:00 UT, 11 April 2008.

This image above is a map of Cygnus where the dimmest star shown is magnitude 7.5. The target area is circled. Binoculars and small telescopes are very capable of seeing this event! The zoomed map you see here is slightly larger than a binocular field of view and features the target area. The magnitudes are also set to 7.5. Should the event brighten, any stars you see that are in the target area brighter than what is shown will be the nova event.

If any updates or corrections occur, I will post them immediately. Clear skies and good luck!

What’s Up – The Weekend SkyWatcher’s Forecast

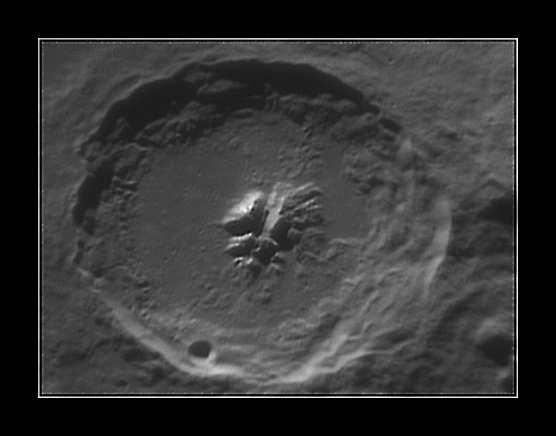
Theophilus - Credit: Wes Higgins

Greetings, fellow SkyWatchers! If we’ve explored the Moon in “Astronomy For Kids”, then by all means let’s explore the Moon in Astronomy for BIG kids! This weekend would be an great opportunity to dust off your telescopes or binoculars and do a little moongazing, because… Here’s what’s up!

Friday, April 11 – Tonight we’ll begin our SkyWatcher’s Weekend by heading toward the lunar surface to view a very fine old crater on the northwest shore of Mare Nectaris – Theophilus. Slightly south of midpoint on the terminator, this crater contains an unusually large multiple-peaked central mountain which can be spotted in binoculars. Theophilus is an odd crater: it’s shaped like a parabola – with no area on the floor being flat. It stretches across a distance of 100 kilometers and dives down 440 meters below the surface. Viewable in binoculars, Theophilus tonight it will appear dark, shadowed by its massive west wall, but if you’re using a telescope, look for sunrise on its 1400 meter summit!

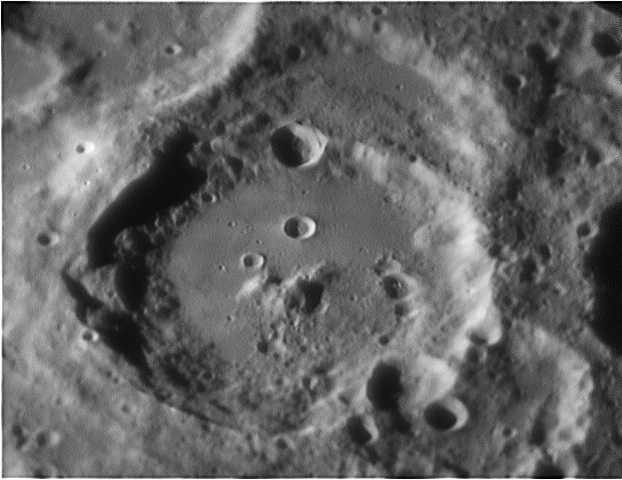
Wes HigginsSaturday, April 12 – Today marks the 1851 birth of Edward Maunder – a bank teller turned assistant Royal Astronomer. Assigned to photographing and cataloging sunspots, Maunder was the first to discover solar minimum times and equate these with climate change. Maunder was also the first to suggest that Mars had no “canals,” only delicate changes in surface features. Smart man!

On Saturday night, Mars will play a very important role in observing as it will be slightly more than a degree away from the Moon’s limb for many observers. As grand as observing can be when the planet is near, it doesn’t even come close to the details that can be seen on the Moon. An outstanding feature visible tonight will be crater Maurolycus just southwest of the three rings of Theophilus, Cyrillus and Catharina. This Lunar Club challenge spans 114 kilometers and goes below the lunar surface by 4730 meters. Be sure to look for Gemma Frisius just to its north.

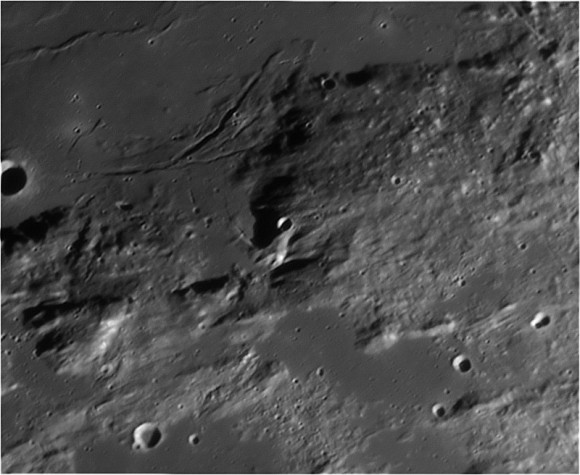
Wes HigginsSunday, April 13 – Tonight, let’s have a look at the Moon as challenge craters Cassini and Cassini A have now come into view just south of the black slash of the Alpine Valley. For more advanced lunar observers, head a bit further south to the Haemus Mountains to look for the bright punctuation of a small crater. You’ll find it right on the southwest shore of Mare Serenitatis! Now power up and look for a curious feature with an even more curious name…Rima Sulpicius Gallus. It is nothing more than a lunar wrinkle which accompanies the crater of the same name – a long-gone Roman counselor. Can you trace its 90 kilometer length?

Wishing you clear skies!

This week’s awesome lunar images belong to noneother than Wes Higgins. Many thanks!

Moon for Kids

New Moon Schedules
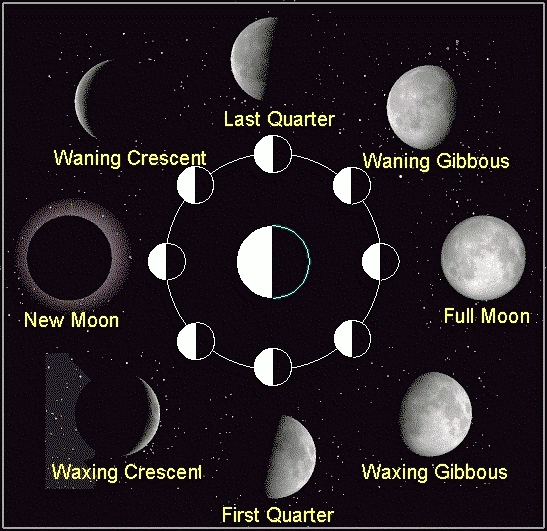
Moon Phases

Right now, while the sky still gets dark early, is a great time to enjoy looking at the Moon with your small children or grandchildren. Even if you don’t have a telescope or binoculars, there are lots of fun ways that you can both enjoy our mysterious Moon together. Each evening as it gets dark, go outside and take a look at where the Moon is. There are nights when it will be cloudy, so it makes the game even more fun!

Having the Moon in the sky is something that we noticed all our lives, but most of us don’t think very much about it. When was the last time you saw the Moon? What did it look like? If you went outside, where would you find it? By learning to keep a “Moon Journal” you will soon learn much more about Earth’s nearest neighbor.

Keeping a Moon Journal is easy. All you need is a pencil and paper, and to understand where the cardinal directions are outside. If you have a compass, that’s great. But if you do not, remember to watch where the Sun sets. Next you need to choose a place! Look for an area that you can see most of the southern sky. Use your compass to find south or keep your right shoulder to the direction the Sun set. Don’t worry if there are things in the way, because trees, houses and even power wires will help with what we’re going to do. Mark the spot you chose by drawing an X on the pavement with a piece of chalk, or poking a stick into the ground. You must remember to return to this same spot each time.

Simple sketches make for lunar fun!Now you are ready to begin observing! The most important part about keeping a Moon Journal is to look for the Moon the same time each night. Right now about 8:30 or 9:00 will do very well. Go outside and look for the Moon. Do you see it? Good! Make a very simple picture of where you see the Moon in the sky and be sure to include things like a house or tree in your picture. It doesn’t have to be any more difficult than what you see here. Try your observations for several nights and see if you can learn to predict where the Moon will appear and what it will look like!

Now, let’s experiment with why the Moon has phases. All it takes is a bright flashlight and a ball on a stick. (Even an apple on a fork makes a great Moon, and you can eat it, too!) Whoever is holding the flashlight becomes the Sun and the Earth is your head. If you hold the ball out at arm’s length just above the flashlight while facing the Sun, you can’t see it. This is New Moon. The Moon is still in the sky, but we can’t see it because of the bright sunlight. Now keep the ball at arm’s length and turn slowly counterclockwise and watch what happens. That’s right! You see the ball go through phases, just like our Moon. When your back is towards the Sun, you see the ball as whole, and it will be Full Moon. The Moon will rise on the opposite side of the Earth at the same time the Sun goes down. Keep turning and you’ll see the phases reverse as the Moon moves back towards the Sun again.

Ask your child if he or she has ever seen the Moon during the daytime. Where in the sky do they think the Sun and the Moon needs to be for this to happen? What would happen if the Moon was in front of the Sun? How about the Earth?

Simple experiments like this are a great way to teach children more about astronomy!

Universe Today Astronomy Picture of the Week – NGC 6188: An Interstellar Portrait

Just one glimpse at this photo by Don Goldman tells a thousand words. Residing in the southern constellation of Ara, this incredible dust cloud is at home in Ara OB1 association, which covers a full degree of sky. Some 4000 light years away in the disk of our Galaxy, NGC 6188 sprawls across the edge of an expanding bubble of gas that could be as much as 300 light years wide.
Continue reading “Universe Today Astronomy Picture of the Week – NGC 6188: An Interstellar Portrait”

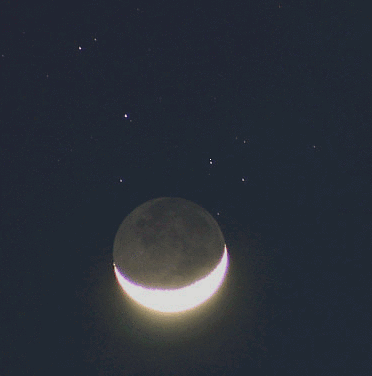
SkyWatcher Alert: Pleiades Occultation on April 8

Moon and M44 by John CudworthSure. For those of us who hang around the night sky, we know the Pleiades and the Moon frequently venture near each other during the course of a year, but it’s much less common for the Moon to be in a crescent phase when they visit. Because the light of the nearby Moon often overpowers the cool, blue star cluster M45, SkyWatchers rarely have the opportunity to see the Moon sedately cover its stars. Not this time… Continue reading “SkyWatcher Alert: Pleiades Occultation on April 8”
UK “Time Machine” Reveals The Formation Of Distant Galaxies

foucaud_press_release_nam082.thumbnail.jpg

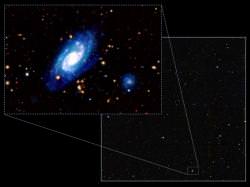
If you thought the Hubble Deep Field galaxy photo was the most incredible thing you’ve ever seen, wait until you lay eyes on the most sensitive infrared map of the distant Universe ever taken. Over the last three years, UK astronomers have compiled data from the United Kingdom Infrared Telescope (UKIRT) in Hawaii and their results are nothing less than astounding.

Today, Dr. Sebastien Foucaud from the University of Nottingham presented his first results to the April 4 National Astronomy Meeting of the Royal Astronomical Society. These results only form part of the Ultra-Deep Survey (UDS) – an image containing over 100,000 galaxies over an area four times the size of the full Moon – and a look into the formation of the most distant galaxies yet witnessed.

The 3.8-metre (12.5-foot) UK Infrared Telescope (UKIRT) became a time machine as the world’s largest telescope dedicated solely to infrared astronomy began its Deep Sky Survey in 2005. Even now, the UDS image is but only one element of a five-part project. Due to the constraints of the speed of light, these observations allow astronomers to literally look back 10 billion years in time. The images that UKIRT produces see our Universe in its distant infancy, and the formation galaxies which date to back where we believe expansion began. The image is so large and so deep that thousands of galaxies can be studied at these early epochs for the very first time. Through the technological advance of infrared imaging, astronomers can now peer even further back in time, since light from the most distant galaxies is shifted towards redder wavelengths as it travels through the expanding Universe.

“I would compare these observations to the ice cores drilled deep into the Antarctic,” said Dr. Foucaud. “Just as they allow us to peer back in time, our ultra-deep image allows us to look back and observe galaxies evolving at different stages in cosmic history, all the way back to just 1 billion years after the Big Bang”.

One of the goals of the project is to further scientific understanding about the time frame in which rare, massive galaxies formed in the distant Universe. It is a puzzle that has simply remained unsolved. Says Dr. Foucaud: “We see galaxies 10 times the mass of the Milky Way already in place at very early epochs. Now, for the first time, we are sampling a large enough volume of the distant Universe to be able to see them in sufficient numbers and really pin down when they were formed.”

The UKIDSS Ultra-Deep Survey will, in time, give us a complete census of galaxy formation in the infrared. So far over one hundred thousand galaxies have been detected and the final image will be 100 times larger than any equivalent survey to date. Determining precise distances to faint galaxies is very difficult, requiring long hours of spectroscopy. For the faintest objects in the UDS survey this is often impossible. Instead, by using optical and infrared colors, astronomers are very effectively able separate distant galaxies from those which are nearby, and further separate them into those which are forming stars and those which are not. UKIDSS aims to discover the nearest object to the Sun (outside the solar system) as well as some of the farthest known objects in the Universe.

Does the Ultra-Deep Sky Survey images shed light on the great cosmological mystery? Only time – and distance – will tell. Professor Andy Lawrence, Principle Investigator of UKIDSS from the University of Edinburgh, said “As we keep taking images over the next few years, we will see ever more distant galaxies.”

What’s Up – The Weekend SkyWatcher’s Forecast

messier_catalog.thumbnail.jpg

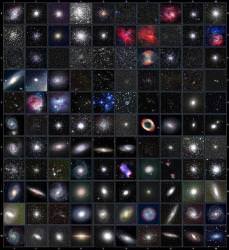
Greetings, fellow SkyWatchers! Right now is a splendid time of year for those who live in high northern latitudes to look out for auroral activity – the alert is out! For those who enjoy just keeping an eye on the sky, be on watch for the Kappa Serpentid meteor shower. Its radiant will be near the “Northern Crown,” the constellation known as Corona Borealis. The fall rate is small with an average four or five per hour. Even though the slender crescent Moon will be visible at sky dark this weekend, it’s time to dig through the archives and dance the Messier Marathon! Are you ready?

Friday, April 4 – Although a bit of Moon will light up the scene as evening begins, it won’t seriously hamper your observations. Beginning as soon as the sky darkens enough to find the guidestar Delta Cetus, the M77 spiral galaxy will be your first, and the M74 spiral galaxy east of Eta Pisces will be your second mark. Both of these galaxies are telescopic only and will be an extreme challenge at this time of year due to their low position. Even computer-assisted scopes will have some difficulty revealing this pair under less than optimal conditions. Next up is M33 west of Alpha Triangulum. With ideal skies, the “Pinwheel Galaxy” could be seen in binoculars, but skybright will make this huge, low surface brightness spiral difficult for even telescopes at low power. M31 – the Andromeda Galaxy – will, however, be a delightful capture for both binoculars and scopes just west of Nu Andromedae. For the telescope, two more on the list are companions to M31 – the elliptical M32 on the southeastern edge and M110 to the northwest.

Let’s head northwest as we take on two open clusters visible to both telescopes and binoculars. You can find M52 easiest by identifying Alpha and Beta Cassiopeia, drawing a mental line between them and extending it the same distance northwest of Beta. Next just hop north of Delta to pick up our ninth object – the M103 open cluster. Time to head south towards Perseus and go back to the telescope to locate M76, the “Little Dumbbell” planetary nebula, just north of Phi. Binoculars are all that’s needed to see the M34 open cluster also in Perseus, located roughly halfway between the “Demon Star” Algol and lovely double Almach, Gamma Andromeda.

Now that skies are truly dark and the fastest setting objects are out of the way, we can take a moment to breathe as we view M45 – the Pleiades. The “Seven Sisters” are easily visible to the unaided eye high in the west and their cool, blue beauty is incomparable in binoculars or telescopes. Our next “hop” is with the “rabbit” Lepus as we go back to the south and identify Beta and Epsilon. Triangulating with this pair to the south is a nearly fifth magnitude star (ADS 3954) which will help you locate the small globular M79 to its northeast. At around magnitude 8.5, it is possible to see its very tiny form in binoculars, but M42 – the “Great Orion Nebula” is much easier. The next object, M43, is part of the Orion Nebula, and you will catch it as a small “patch” to the north-northeast. The next two objects, M78 northeast of Zeta Orionis and the M1 Crab Nebula northwest of Zeta Tauri, are both achievable in binoculars with excellent conditions, but are far more interesting to the telescope.

Now we can really relax. Take a few minutes and grab a cup of coffee or hot chocolate and get warmed up. The next several objects on our observing list for tonight are all very easy, very well positioned for early evening, and all observable in just binoculars. Are you ready? Then let’s go.

M35 is just as simple as finding the “toe” of Gemini – bright Eta. A short hop to the northwest will capture this fine open cluster. The next stop is Auriga and we’ll go directly between silicon star Theta and southern Beta. About halfway between them and slightly to the east you will find open cluster M37. This time let’s use Theta and Iota to its west. Roughly halfway between them and in the center of Auriga you will find M38 and a short hop southeast will capture M36. Now let’s get Sirius and finish this list for tonight. The open cluster M41 in Canis Major is found just as quickly as drifting south of the brightest star in the sky. The next three for tonight couldn’t be any easier – because we’ve studied them before. Go capture M93, M47 and M46 group in northern Puppis… And give yourself a well-deserved pat on the back.

You’ve just conquered 24 Messiers!

Next up will be four more binocular targets, the incredibly colorful open cluster M50 is roughly a third of the way in a line drawn between Sirius and Procyon – use binoculars. Hydra is a difficult constellation, but try dropping south-southeast of the most eastern star in Monoceros – Zeta – about half a fist’s width to discover relatively dim open cluster M48. Far brighter, and usually visible to the unaided eye is M44, better known as the Beehive Cluster, just a scant few degrees north-northwest of Delta Cancri. From Delta, go south and identify Alpha because M67 is just to its west. It will appear as a “fine haze” to binoculars, but telescopes will find a spectacular “cloud” of similar magnitude resolvable stars.

Now we really do have to use the telescope again because we’re going “lion taming” by hunting galaxies in Leo. Let’s trade one Alpha for another as we head west to Regulus. Roughly about a fist width east of this major star you will see two dim stars that may require the use of the finderscope – 52 to the north and 53 to the south. We’re heading right between them. About a degree and a half south of 52, you will discover ninth magnitude elliptical M105. Larger scopes will also show two additional faint galaxies, NGC 3384 and NGC 3389 to M105’s west. Continuing about a degree south towards star 53 you will spot the silver-gray beauty of M96 in a relatively starless field. Enjoy its bright nucleus and wispy arms.

About another degree west will bring you to M95, which is neither as bright nor as large as its Messier “neighbor.” Small scopes should show a brightening towards its center and large ones should begin to resolve out the arms of this awesome barred spiral. Our next destination is the southwestern star of the three that mark Leo’s “hips,” Theta Leonis – or more commonly called Chort. South of it you will see faint star 73 and right around one degree to its east-southeast you will locate a pair. In small scopes at low power, M65 and M66 are same field. The western M65 and eastern M66 are both beautiful spirals.

Now let’s head north for another “same field pair” of galaxies and hunt down M81 and M82 in Ursa Major. Many folks have trouble “star hopping” to these galaxies, but a very simple way of finding them is to draw a mental line between Phecda (Gamma) and Dubhe (Alpha). By extending that line beyond Dubhe almost the same distance, you’ll locate our next two “marathon” objects. At low power with a smaller scope, the southern-most and most pronounced of the two is the stunning M81 with its bright core. To the north is broken, spindle-shaped peculiar galaxy M82. Viewable in binoculars, we’ll study more about this pair later on as we head for Mirak (Beta) and our next galaxy. About a degree and a half southeast you will see a 10th magnitude “scratch” of light. This great edge-on galaxy – M108 – should show at least four brighter “patches” to the small scope and a nice dark dust-lane to larger ones. Continuing about another half degree southeast will bring you to the planetary nebula M97. Also known as the “Owl,” this 12th magnitude beauty is roughly the same diameter as Jupiter and can be spotted under optimal conditions with binoculars – but requires a large scope at high power to begin to discern its features. Let’s continue south to Phecda and less than half a degree to the east you will locate M109. In the field with Gamma, M109 will show its faded central bar and prominent nucleus to the small scope, but requires large aperture and high magnification to make out structure. The last in Ursa Major is an error on Messier’s part. Labeled as M40, this object is actually double star WNC 4, located in the same eyepiece field as 70 Ursae Majoris to the northeast.

Now let’s take a deep breath and move into Canes Venatici to round up a few more. This is an area of dimmer stars, but the two major stars, Alpha (it is called Cor Caroli and it is a wonderful double star) and Beta are easily recognizable to the east of the last star in the “handle” of the “Big Dipper” (Eta). The northernmost is Beta and you will find the soft-spoken spiral galaxy M106 almost midway between it and Phecda less than 2 degrees south of star 3. M94 is a much brighter, compact galaxy and is found by forming an isosceles triangle with Alpha and Beta Canum with the imaginary apex towards Eta Ursae Majoris. M63 is a very pretty, bright galaxy (often known as “the Sunflower”) that approaches magnitude 10 and is found about one-third the distance between Cor Caroli and Eta Ursae Majoris (Alkaid). Still heading towards Alkaid (Eta UM), the incomparable M51 comes next. Near Eta you will see an unmistakable visual star called 24 CnV, the “Whirlpool” is the same basic distance to the southwest. Now that we’re back into “big bear country” again, we might as well head on to the M101 “Pinwheel” galaxy which is found by following the same trajectory and distance to the other side of Alkaid. Before we head on, let’s continue north and clean up… ummm… another “messy mistake.” The accepted designation for M102 is lenticular galaxy NGC 5866, located in Draco south east of Iota.

Now let’s finish up – it’s time for a break! Our next stop will be to identify the three primary stars of Coma Berenices now high in the east above Arcturus. You will find small globular cluster M53 northeast of Alpha. One of the coolest galaxies around is M64 (known as the “Blackeye”) just a degree east-northeast of 35 Comae, which is about one-third the distance between Alpha Comae and Alkaid. The last, and most outstanding for this half of the night, is a globular cluster that can be seen in binoculars – M3. As strange as this may sound, you can find M3 easily by drawing a line between Cor Caroli and Arcturus. Starting at Arcturus, move up about one third the way until you see Beta Comae to the west of your “line”… Poof. There it is.

Awesome job. We’ve just completed another 24 objects and we’ve claimed 48 on the Messier list before midnight.

Saturday, April 5 – These next targets will be best viewed after midnight when the constellations of Coma Berenices and Virgo have well risen, providing us with the darkest sky and best position. For the large telescope, we are going to be walking into an incredibly rich galaxy field that we will touch on only briefly because they will become the object of future studies. Just keep in mind that our Messier objects are by far the brightest of the many you will see in the field. For the smaller scope? Don’t despair. These are quite easy enough for you to see as well and probably far less confusing because there won’t be so many of them visible. Now let’s identify the easternmost star in Leo – Denebola – and head about a fist width due East…

Our first will be M98, just west of star 6 Comae. It will be a nice edge-on spiral galaxy in Coma Berenices. Next return to 6 Comae and go one degree southeast to capture M99, a face-on spiral known as the “Pinwheel” that can be seen in apertures as small as 4″. Return to 6 Comae and head two degrees northeast. You will pass two fifth magnitude stars that point the way to M100 – the largest appearing galaxy in the Coma/Virgo cluster. To the average scope, it will look like a dim globular cluster with a stellar nucleus. Now let’s continue on two degrees north where you will see bright yellow 11 Comae. One degree northeast is all it takes to catch the ninth magnitude, round M85. (Ignore that barred spiral. let’s keep moving…) Now, let’s try a “trick of the trade” to locate two more. Going back to 6 Comae, relocate M99 and turn off your drive. If you are accurately aligned to the equator, you may now take a break for 14 minutes. When you return the elongated form and near stellar nucleus of M88 will have “drifted” into view. Wait another two to three minutes and the faint barred spiral M91 will have joined the show in a one degree field of view… Pretty fun, huh?

Now let’s shift guidestars by locating bright Vindemiatrix (Epsilon Virginis) almost due east of Denebola. Let’s hop four and a half degrees west and a shade north of Epsilon to locate one of the largest elliptical galaxies presently known – M60. At a little brighter than magnitude 9, this galaxy could be spotted with binoculars. In the same telescopic low power field you will also note faint NGC 4647 which only appears to be interacting with M60. Also in the field is our next Messier, bright cored elliptical M59 to the west. (Yes, there’s more – but not tonight.) Moving a degree west of this group will bring you to our “galactic twin,” fainter M58. Moving about a degree north will call up face-on spiral M89, which will show a nice core region in most scopes. One half degree northeast is where you will find the delightful 9.5 magnitude M90 – whose dark dust lanes will show to larger scopes. Continue on one and a half degrees southwest for M87, one of the first radio sources discovered. This particular galaxy has shown evidence of containing a black hole and its elliptical form is surrounded by more than 4,000 globular clusters.

Just slightly more than a degree northwest is a same field pair, M84 and M86. Although large aperture scopes will see many more in the field, concentrate on the two bright cored ellipticals which are almost identical. M84 will drift out of the field first to the west and M86 is east. Next we will select a new guidestar by going to 31 Virginis to identify splendid variable R about a degree to its west. We then move two degrees northwest of R to gather in the evenly lighted oval of M49. Now shifting about three degrees southwest, you will see a handsome yellow double – 17 Virginis. Only one-half degree south is the large face-on spiral, M61. Larger scopes will see arms and dust lanes in this one. Last for this location is to head for the bright blue beauty of Spica and go just slightly more than a fist width (11 degrees) due west. M104 – the “Sombrero” galaxy – will be your reward for a job well done.

Congratulations. You’ve just seen 17 of the finest galaxies in the Coma/Virgo region and our “Marathon” total has now reached 65. We’re over halfway home…

With Corvus relatively high to the south, the next drop is about five degrees to the south-south east of Beta Corvi. Just visible to the unaided eye will be the marker star – the double A8612. Eighth magnitude M68 is a bright, compact globular cluster in Hydra that will appear as a “fuzzy star” to binoculars and a treat to the telescope. Our next is tough for far-northern observers, for the “Southern Pinwheel” – M83 – is close to ten degrees southeast of Gamma Hydrae.

Now we’re going to make a wide move across the sky and head southeast of brilliant Arcturus for Alpha Serpentis. About 8 degrees southwest you will find outstanding globular cluster M5 sharing the field with 5 Serpens. Now locate the “keystone” shape of Hercules and identify Eta in its northwest corner. About one-third of the way between it and Zeta to the south is the fantastic M13, also known as the “Great Hercules Globular Cluster.” A little more difficult to find is the small M92 because there are no stars to guide you. Try this trick – Using the two northernmost stars in the “keystone,” form an equilateral triangle in your mind with its imaginary apex to the north. Point your scope there. At sixth magnitude, this compact globular cluster has a distinct nucleus. Both are very binocular friendly.

Now we’re off to enjoy summer favorites and future studies. M57, the “Ring Nebula,” is located about halfway between Sheilak and Sulafat. You’ll find the small globular M56 residing conveniently about midpoint between Sulafat and Alberio. About 2 degrees south of Gamma Cygni is the bright open cluster M29. And equally bright M39 lays a little less than a fist width to the northeast of Deneb. If you remember the hop north of Gamma Sagitta, you’ll easily find M27, the “Dumbbell Nebula,” and the loose globular, M71, just southwest of Gamma. All of the objects in this last paragraph are viewable with binoculars (albeit some are quite small) and all are spectacular in the telescope.

And now we’ve made it to 76 on our “Messier Hit List.”

So, are you having fun yet? I’m not about to let you go. We’re moving into early morning skies and looking at our own galactic halo as we track down some great globular clusters. Ophiuchus is a sprawling constellation and its many stars can sometimes be hard to identify. Let’s start first with Beta Scorpii (Graffias) and head about a fist’s width to the northeast. That’s Zeta and the marker you will need to locate M107. About one quarter the way back towards Graffias, you will see a line of three stars in the finder. Aim at the center one and you’ll find this globular in the same field. Now go back to Zeta and you will see a pair of similar magnitude dim stars higher to the northeast. The southernmost is star 30 and you will find the M10 globular cluster about one degree to its west. M12 is only about three degrees further along to the northeast. Both are wonderfully large and bright enough to be seen in binoculars.

Now we need to identify Alpha in Ophiuchus. Head toward Hercules. South of the “keystone” you will see bright Beta Hercules with Alpha Hercules to the southeast. The next bright star along the line is Alpha Ophiuchi and globular cluster M14 is approximately 16 degrees south and pretty much due east of M10. Now let’s head for bright Eta Ophiuchi (Sabik) directly between Scorpius and Sagittarius. The next globular, M9, is about three and a half degrees southeast.

Let’s move on to an easier one. If you know is Antares, you can find the globular cluster M4 in Scorpius. All you have to do is aim your binoculars at this brilliant red star, for this diffuse giant is just a little over one degree to the west. Go back to Antares and shift about four degrees to the northwest and you’ll find compact, bright globular M80. It will be very small in binoculars, but it’s quite bright. Going back to the scope is best for M19, although it’s easy to find around seven degrees due east of Antares. The last for this region is M62 about a half a fist’s width to the south.

Hey, you’re doing terrific. Some of these are tough to find unless you’ve had practice… But now we’re up to a total of 85. Now let’s dance…

The lower curve of Scorpius is quite distinctive and the unaided eye pair you see at the “stinger” is beautiful double Shaula (Lambda) and its slightly less bright neighbor Upsilon. Aim your binoculars there and head towards the northeast and you cannot miss M6, the “Butterfly Cluster.” Below it and slightly east is a hazy patch, aim there and you will find another spectacular open cluster M7, often known as “Ptolemy’s Cluster.”

Now go north and identify Lambda Aquilae and you will find M11, the “Wild Duck” open cluster just to the west. About the same distance away to the south/southwest you will spot M26, another open cluster. These are all great binocular targets, but it will take an exceptionally dark, clear sky to see the Eagle Nebula associated with the M16 easy open cluster about a fist’s width away to the southwest. Far easier to see is the “Nike Swoosh” of M17 just a little further south. Many of you know this as the “Omega” or “Swan” nebula. Keeping moving south and you will see a very small collection of stars known as M18, and a bit more south will bring up a huge cloud of stars called M24. This patch of Milky Way “stuff” will show a wonderful open cluster – NGC 6603 – to average telescopes and some great Barnard darks to larger ones.

Now we’re going to shift to the southeast just a touch and pick up the M25 open cluster and head due west about a fist’s width to capture the next open cluster – M23. From there, we are dropping south again and M21 will be your reward. Head back for your scope and remember your area, because the M20 “Triffid Nebula” is just a shade to the southwest. Small scopes will pick up on the little glowing ball, but anything from about 4″ up can see those dark dust lanes that make this nebula so special. You can go back to the binoculars again, because the M8 “Lagoon Nebula” is south again and very easy to see.

This particular star hop is very fun. If you have children who would like to see some of these riches, point out the primary stars and show them how it looks like a dot-to-dot “tea kettle.” From the kettle’s “spout” pours the “steam” of the Milky Way. If you start there, all you will need to do is follow the “steam” trail up the sky and you can see the majority of these with ease.

Our Messier temperature has now risen to 98…

OK, folks… It’s “crunch time” and the first few on this list will be fairly easy before dawn, but you won’t have long before the light steals the last few from the sky.

At the top of the “tea kettle” is Lambda. This is our marker for two easy binocular objects. The small M28 globular cluster is quite easily found just a breath to the north/northwest. The larger, brighter and quite wonderful globular cluster M22 is also very easily found to Lambda’s northeast. Now we’re roaming into “binocular possible” but better with the telescope objects. The southeastern corner of the “tea kettle” is Zeta, and we’re going to hop across the bottom to the west. Starting at Zeta, slide southwest to capture globular cluster M54. Keep heading another three degrees southwest and you will see the fuzzy ball of M70. Just around two degrees more to the west is another globular that looks like M70’s twin. Say good morning to M69.

Now it’s really going to get tough. The small globular M55 is out there in “No Man’s Land” about a fist’s width away east/south east of Zeta and the dawn is coming. It’s going to be even harder to find the equally small globular M75, but if you can see Beta Capricorn it will be about a fist’s width southwest. Look for a “V” pattern of stars in the finder and go to the northeastern star of this trio. You should be able to put it in the same low power field. Without the “square” of Pegasus to guide us, look low to the east and identify Enif by its reddish color. (Delphinus above it should help you.) Power punch globular M15 is to Enif’s northwest and you should be able to see the star on its border in the finderscope. Let’s be thankful that M2 is such a fine, large globular cluster. The hop is two thirds of the way between Enif and Beta Aquarius, or just a little less than a fist’s width due west of Alpha.

Let’s hope that Beta is still shining bright, because we’ll need to head about a fist’s width away again to the southwest to snag what will now be two very dim ones – the M72 globular cluster and M73 open cluster just west of Nu Aquarius. We’re now dancing just ahead of the light of dawn and the M30 globular cluster is our last object. Hang on Delta Capricornus and show us the way south/southwest to star 41. If you can find that? You’ve got the very last one…

We’ve done the Messier Catalog of all 110 objects in just one night.

Is this a perfect list with perfect instructions? No way. Just like the sky, things aren’t always perfect. This is just a general guideline to helping you find the Messier objects for yourself. Unless you are using a computer-guided scope, it truly takes a lot of practice to find all the Messiers with ease, so don’t be discouraged if they just don’t fall from the sky. You might find all of these in one year or one week – and you just might find all of them in one good night. Regardless of how long it takes you – or when the skies cooperate – the beauty, joy and reward is the peace and pleasure it brings.

Clear skies!