Choose Your Observing Site To Use A Telescope
One of the most important things to begin with is to carefully choose the site you will use set up and use your telescope at. While it would be tempting to take your new telescope out of the box and use it that night, it’s best to wait just a day or two! Begin the first clear night by going outside a taking a good look around. You want to choose an observing site where the view is as unobstructed and as dark as possible. While you are doing this, keep in mind that it must be comfortable to you as well. While the vista might be far improved a kilometer away – do you really want to have to take your equipment that distance each time you want to use it? Look at many different alternatives. If you live in a city, perhaps a rooftop will serve well. Urban settings often have very suitable yards that will work for most observing projects and rural settings are ideal.
Light pollution is another factor when choosing your site. Again, keep in mind that you must have a site that is accessible to enjoy. It isn’t always possible if you live in a well-lit area to take your equipment remote each time you want to use your telescope – but a sheltered area, such as in the shadow of a house, often blocks stray light well enough to enjoy using your telescope right at home. Of course, finding a dark sky site is also important, too. But not half as much as just finding a spot that you will enjoy and use.
While out during the day, look for level, solid ground. No one wants to see their telescope take a tumble. While it is tempting to set up on a deck, remember that any footsteps will cause vibration in the image. Setting up on places like a blacktop driveway or concrete can also cause thermal issues, too. Avoid them when you can, but do not discard these types of sites if they are comfortable and accessible.
How To Set Up Your Telescope
 While every telescope set-up is slightly different, they are all basically the same in some respects. There must be an optical tube of some type, a mount and eyepieces. Take the time to become familiar with all the components of your telescope! If you must assemble and dis-assemble your telescope each time you use it, it’s a very wise idea to practice a few times before you go out in the dark. There is simply nothing more frustrating that trying to learn to set up your equipment when you cannot see what you are doing – or to loose a small part in the dark. If it is at all possible, leave your telescope and tripod fully assembled and in a place where it is easy to set outside at a moment’s notice. You’ll find that you’ll use it far more often if it takes less work.
 Your telescope’s view is also dependent on ambient temperature. If you wear eyeglasses, you understand why! If you go from a very cool environment, such as a air-conditioned house, into a humid outdoors setting, your glasses fog up, don’t they? And so will your telescope’s optics. The same is true when observing outdoors in the winter. When taking your telescope from a heated climate to a cold one, you must give the telescope time to “cool down”. Even just a few degrees can mean waiver in the image.
Align your finderscope in advance! While this sounds rather strange, another frustrating thing to do in the dark is to align a finderscope – especially on a moving target. Once you have learned to assembly your telescope, learn to align your finder. Set up your scope and aim at a distant object. Now align your finder to that object as well. This will make things much easier, later!
Once your telescope is set up, the last thing to remember is to stow your things neatly so you won’t have any problems finding them when it comes time to put things away. Dust covers and eyepieces cases are so easy to lose. Keep things neat and you won’t have any problems. Choose the eyepiece you think you will need in advance and have them in a place where you won’t need to fumble in the dark. Have your red flashlight and maps handy. These are just little things that make using your telescope much more enjoyable!
Choose Your Observing Times
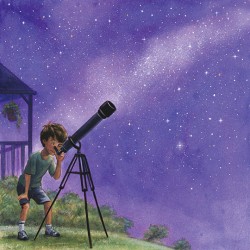 Experience will become your best teacher. It won’t take long before you realize that very humid nights or exceptionally cold ones are not particularly good times to observe. Unless you plan on looking at the Moon itself, nights that are well moon-lit are also not good times to search for a faint galaxy, either. Little things, like waiting for a planet to clear the atmospheric “murk” at the lower horizon mean a much better viewing experience.
How To Use A Telescope
 Now that you have your observing site, learned to set up, and established a time to practice astronomy… Let’s learn how to use your telescope!
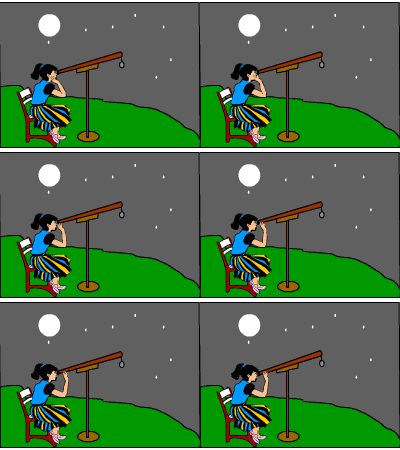
If you have an equatorial mount, align the axis to the pole star. Altazimuth mounts do not need this step. Take off your dustcaps and stow them away. Double check to make sure your tripod legs are secure. Choose your low power eyepiece and put it in the focuser. Are you ready? Now, loosen the axis and take aim at a star using your finderscope. When the star is aligned in the center of the finder, tighten the axis and it’s time to go to the eyepiece. Gently adjust the focus in or out until you have a crisp, clean image. Now watch the star move. This direction is always west – regardless of the orientation in the eyepiece. For equatorial mounts, use your slow motion cables to learn to “track” the star. For altazimuth mounts, use the pan control or shift the tube manually (dobsonian models). Once you have learned to “follow” and object, it’s time to star hop!
Each time you go to a new object with an equatorial mount, you must unlock the axis. The same is true with some styles of altazimuth mounts. Once you have the general location in the finder, lock the axis back up and use the slow motion cable controls or panhandle control to make small moves. Using a low power eyepiece first will help you locate things much easier, and you can then switch to more magnification once the object is located.
When you are finished for the evening, make sure to replace all your dustcaps. If your optics should become dewed, don’t wipe them off. Allow them to air dry to avoid micro-scratches on delicate coatings. Always make sure to give your observing area one last check before leaving just in case you’ve forgotten something!

