Inspired by SETI Chief, Jill Tarter’s 2009 TED ‘Prize Wish’ to “Empower Earthlings everywhere to become active participants in the ultimate search for cosmic company” the Energetic Ray Global Observatory or ERGO is an exciting new to project that aims to enlist students around the world to turn our whole planet into one massive cosmic-ray telescope to detect the energetic charged particles that arrive at Earth from space. Find out how it works and how your school can get involved Continue reading “ERGO – Students Sign up to Build the World’s Largest Telescope!”
Early “Elemental” Galaxy Found 12.4 Billion Light Years Away
This is definitely a story about a galaxy long ago and far away. An international team of researchers using the Atacama Large Millimeter/submillimeter Array (ALMA) has observed a “submillimeter galaxy” located about 12.4 billion light-years away. Their observations have revealed that the elemental composition of this galaxy in the early universe, at only 1.3 billion years after the Big Bang, was already close to the current elemental composition of the Universe. This means that intense star formation was taking place at that early point in the Universe’s history.
A submillimeter galaxy is a type of galaxy which has intense star formation activity and is covered by large amounts of dust. Since dust blocks observations in visible light, using ALMA’s millimeter wavelength capabilities can penetrate and see though dust clouds. In addition, ALMA also has extraordinary sensitivity, which is capable of catching even extremely faint radio signals. This is one of the most distant galaxies ALMA has ever observed.
The team was able to examine the chemical composition of the galaxy, called LESS J0332, and detected an emission line that contained nitrogen. To do this, they compared the brightness ratio of the observed emission lines from nitrogen and carbon with theoretical calculations. Their results showed that the elemental composition of LESS J0332, especially the abundance of nitrogen, is significantly different from that of the Universe immediately after the Big Bang – which consisted of almost only hydrogen and helium — but was much more similar to that of our Sun today, where a variety of elements exist abundantly.
It took 12.4 billion years for the emission lines from LESS J0332 to reach us, which means that the team was able to observe the galaxy located in the young universe at 1.3 billion years after the Big Bang.
“Submillimeter galaxies are thought to be relatively massive galaxies in the growth phase. Our research, revealing that LESS J0332 already has an elemental composition similar to the sun, shows us that the chemical evolution of these massive galaxies occurred rapidly made in the early universe, that is to say, in the early universe active star formation occurred for a short period of time,” said Tohru Nagao from Kyoto University, co-author of the paper.
The observations were made with ALMA, even though construction is not yet completed; only 18 antennas were used in this observation, while ALMA will be equipped with 66 antennas when completed.
This research was published in the “Letters” section of the journal, “Astronomy & Astrophysics.”
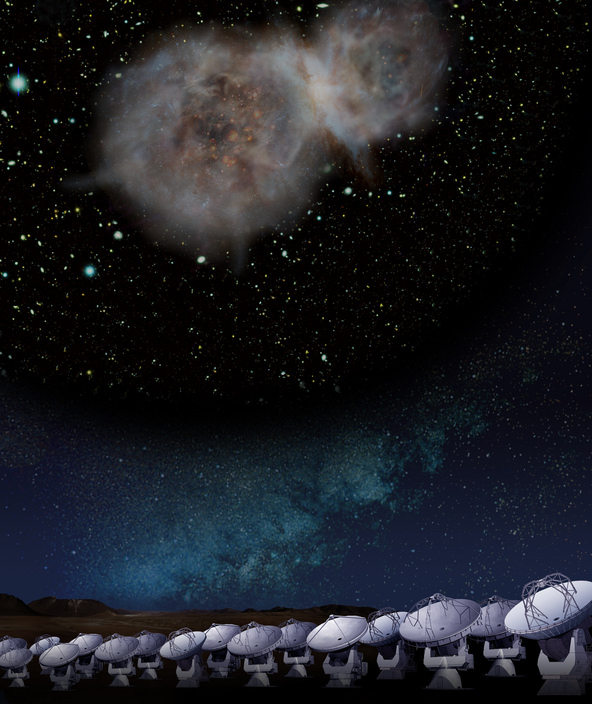
Lead image caption: Artist impression of the submillimeter galaxy LESS J0332 observed the ALMA at the 5000-meter altitude plateau. [Credit: NAOJ]
Source: ALMA
A Close-up Look at the War and Peace Nebula
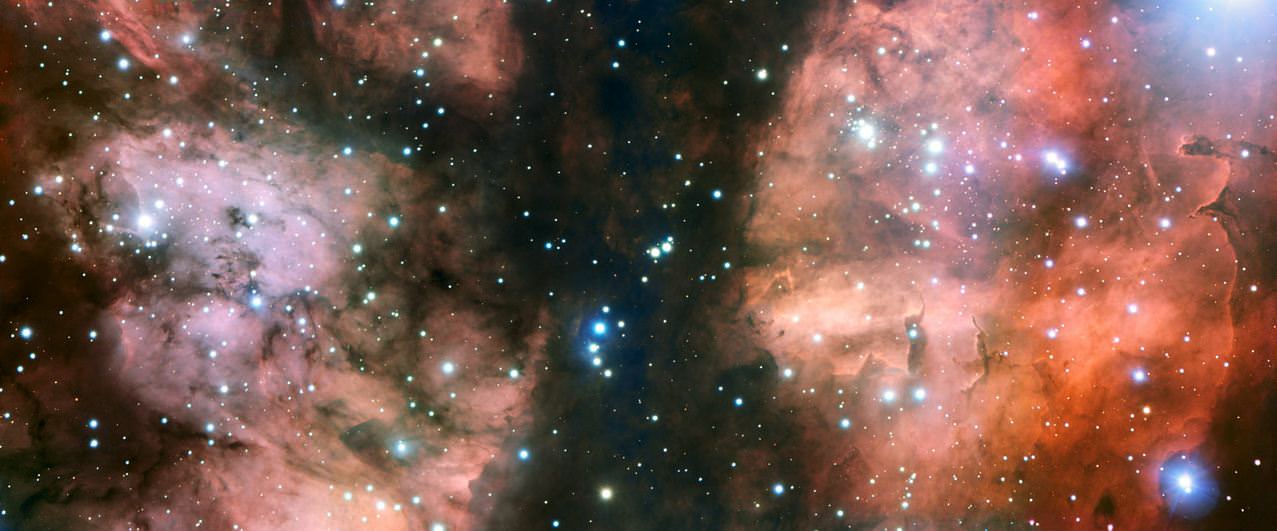
Take a trip out to the constellation of Scorpius get a close-up look at the War and Peace nebula, courtesy of the Very Large Telescope. This is the most detailed visible-light image so far of this spectacular stellar nursery, which is within NGC 6357. The view shows many hot young stars, glowing clouds of gas and weird dust formations sculpted by ultraviolet radiation and stellar winds.
The unusual name of “War and Peace” was given to this nebula not because of the famous novel by Tolstoy, but because in infrared light, the bright, western part of the nebula resembles a dove, while the eastern part looked like a skull. Unfortunately this effect cannot be seen in this visible-light image, but instead we can see dark disks of gas and young stars wrapped in expanding cocoons of dust.
In fact, the whole image is covered with dark trails of cosmic dust, but some of the most fascinating dark features appear at the lower right and on the right hand edge of the picture. Here the radiation from the bright young stars has created huge columns, similar to the famous “pillars of creation” in the Eagle Nebula and other fascinating structures revealed by the awesome power of the VLT.
Lead image caption: The War and Peace Nebula inside NGC 6357, as seen by the Very Large Telescope. Credit: ESO
Source: ESO
Coming Soon: World’s Largest Optical Telescope
[/caption]
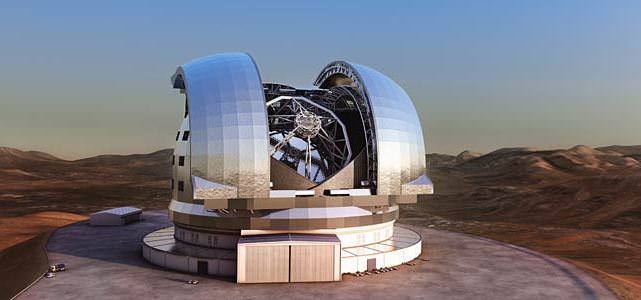
The world’s largest optical/infrared telescope has been given the initial go-ahead to be built. Called the European Extremely Large Telescope (E-ELT) this long-proposed new ground-based telescope will have a 40-meter main mirror and observe the universe in visible and infrared light, making direct images of exoplanets, perhaps find Earth-sized and even Earth-like worlds, and study the first galaxies that formed after the Big Bang.
“This is an excellent outcome and a great day for ESO. We can now move forward on schedule with this giant project,” said the ESO Director General, Tim de Zeeuw.
At a meeting in Garching, France this week, the ESO (European Southern Observatory) Council approved the E-ELT program, with 6 out of 10 countries giving firm approval and four gave “ad referendum” approval, meaning that they needed an official green light from their governments. With that approval, officials are hopeful the E-ELT could start operations by the early 2020’s.
The new super-large eye on the sky will be built at Cerro Armazones in northern Chile, close to ESO’s Paranal Observatory.
The cost is expected to be $1.35 billion USD (1.083-billion-euro)
“World-leading projects of this kind inspire us all and are hugely effective in bringing young people into careers in science and technology,” said David Southwood, president of the Royal Astronomical Society.
This type of telescope has been on the priority list for astronomy by scientists around the world.
The E-ELT will gather 100 million times more light than the human eye, eight million times more than Galileo’s telescope which saw the four biggest moons of Jupiter four centuries ago, and 26 times more than a single VLT telescope.
“The E-ELT will tackle the biggest scientific challenges of our time, and aim for a number of notable firsts, including tracking down Earth-like planets around other stars in the ‘habitable zones’ where life could exist — one of the Holy Grails of modern observational astronomy,” the ESO said.
ESO said that early contracts for the project have already been placed. Shortly before the Council meeting, a contract was signed to begin a detailed design study for the very challenging M4 adaptive mirror of the telescope. This is one of the longest lead-time items in the whole E-ELT program, and an early start was essential.
Detailed design work for the route of the road to the summit of Cerro Armazones, where the E-ELT will be sited, is also in progress and some of the civil works are expected to begin this year. These include preparation of the access road to the summit of Cerro Armazones as well as the leveling of the summit itself.
Source: ESO
Surprise! NASA Gets Two ‘Free’ Hubble-like Space Telescopes
[/caption]
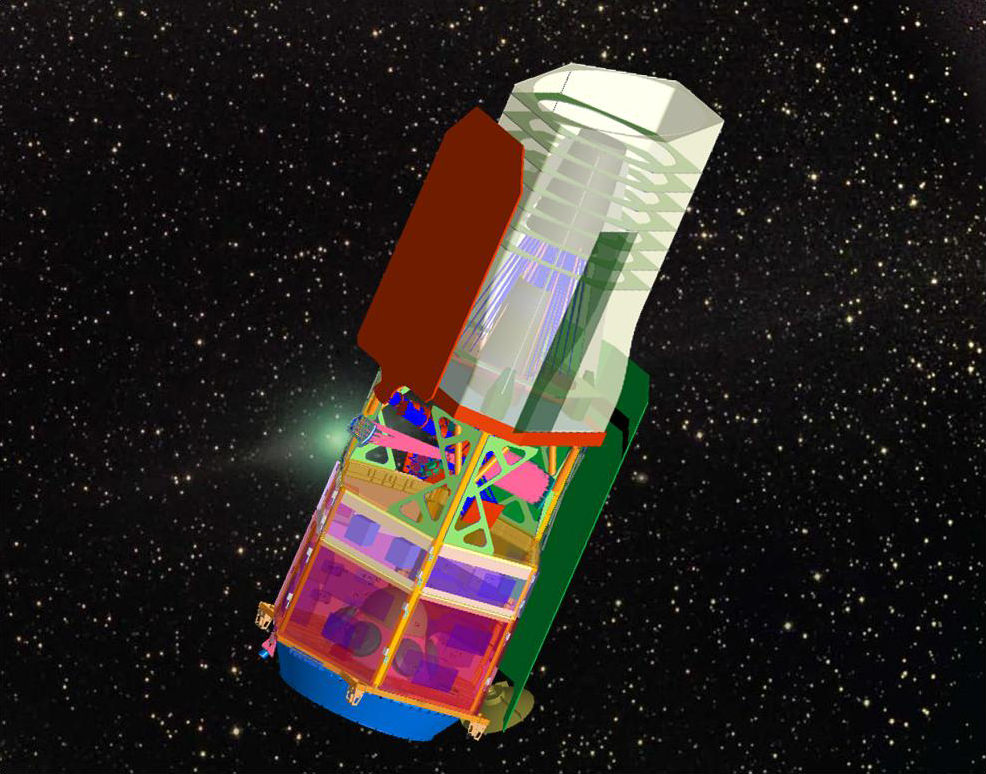
NASA will be getting two unused space surveillance satellites from the US’s National Reconnaissance Office, which could possibly be used to search for dark energy. In articles in the Washington Post and the New York Times, NASA and NRO officials revealed the two unused and not-fully-built satellites are available for NASA to use as they see fit. While the satellites don’t have astronomical instruments and are still in a warehouse, they do have 2.4-meter (7.9 feet) mirrors, just like Hubble, with a wider field of view and a maneuverable secondary mirror that makes it possible to obtain better-focused images.
“This is a total game changer,” said David N. Spergel of Princeton, quoted in the New York Times, who is co-chairman of a committee on astronomy and astrophysics for the National Academy of Sciences.
Reportedly, the NRO contacted NASA in 2011 about the two spy satellites. Since taking over as head of the NASA Science Directorate early this year, former Hubble repairman John Grunsfeld has been working with scientists and other NASA officials to quietly study the possibility of using the two satellites as “repurposed telescopes.”
Originally designed to look at Earth for surveillance, the two telescopes could be turned to look at the heavens instead, as the National Reconnaissance Office said they no longer needed them for spy missions. Why two such spy telescopes were under construction and then scrapped is not clear.
Described as not fully built and some parts being in “bits and pieces,” NASA will have to decide on how they should be used, build additional instruments, launch them, and support the operations.
Reportedly, Grunsfeld and his secret team have come up with a plan to turn one of the telescopes to investigate the mysterious dark energy that is speeding up the expansion of the universe.
NASA officials stressed that they do not have a program or a budget to launch even one telescope at the moment, and that at the very earliest, under favorable budgets, it would be 2020 before even one of the two gifted telescopes could be ready for a mission.
The Washington Post asked Grunsfeld whether anyone at NASA was popping champagne, and he answered, “We never pop champagne here; our budgets are too tight.”
In the latest decadal survey the astronomical community had suggested a dark energy telescope as its top priority in astronomy and astrophysics, but the lack of funding – along with huge cost overruns by the James Webb Space Telescope — made it seem like such a telescope would be an impossibility.
The two telescopes could possibly be used for the proposed WFIRST project, which seemingly was not going anywhere with the latest budget proposal or as a ‘scout’ for the JWST.
“It would be a great discovery telescope for where Webb should look in addition to doing the work on dark energy,” Spergel said in the Washington Post.
Astronomers will be discussing the possibilities at a meeting at the National Academy of Sciences held on today in Washington, D.C. and how they could turn the two gifted telescopes into official missions.
Read more in the Washington Post and the New York Times.
How To Measure the Universe
Measuring distance doesn’t sound like a very challenging thing to do — just pick your standard unit of choice and corresponding tool calibrated to it, and see how the numbers add up. Use a meter stick, a tape measure, or perhaps take a drive, and you can get a fairly accurate answer. But in astronomy, where the distances are vast and there’s no way to take measurements in person, how do scientists know how far this is from that and what’s going where?
Luckily there are ways to figure such things out, and the methods that astronomers use are surprisingly familiar to things we experience every day.
[/caption]The video above is shared by the Royal Observatory Greenwich and shows how geometry, physics and things called “standard candles” (brilliant!) allow scientists to measure distances on cosmic scales.
Just in time for the upcoming transit of Venus, an event which also allows for some important measurements to be made of distances in our solar system, the video is part of a series of free presentations the Observatory is currently giving regarding our place in the Universe and how astronomers over the centuries have measured how oh-so-far it really is from here to there.
Video credits:
Design and direction: Richard Hogg
Animation: Robert Milne, Ross Philips, Kwok Fung Lam
Music and sound effects: George Demure
Narration and Astro-smarts: Dr. Olivia Johnson
Producer: Henry Holland
By Thor’s Mighty Helmet!
[/caption]
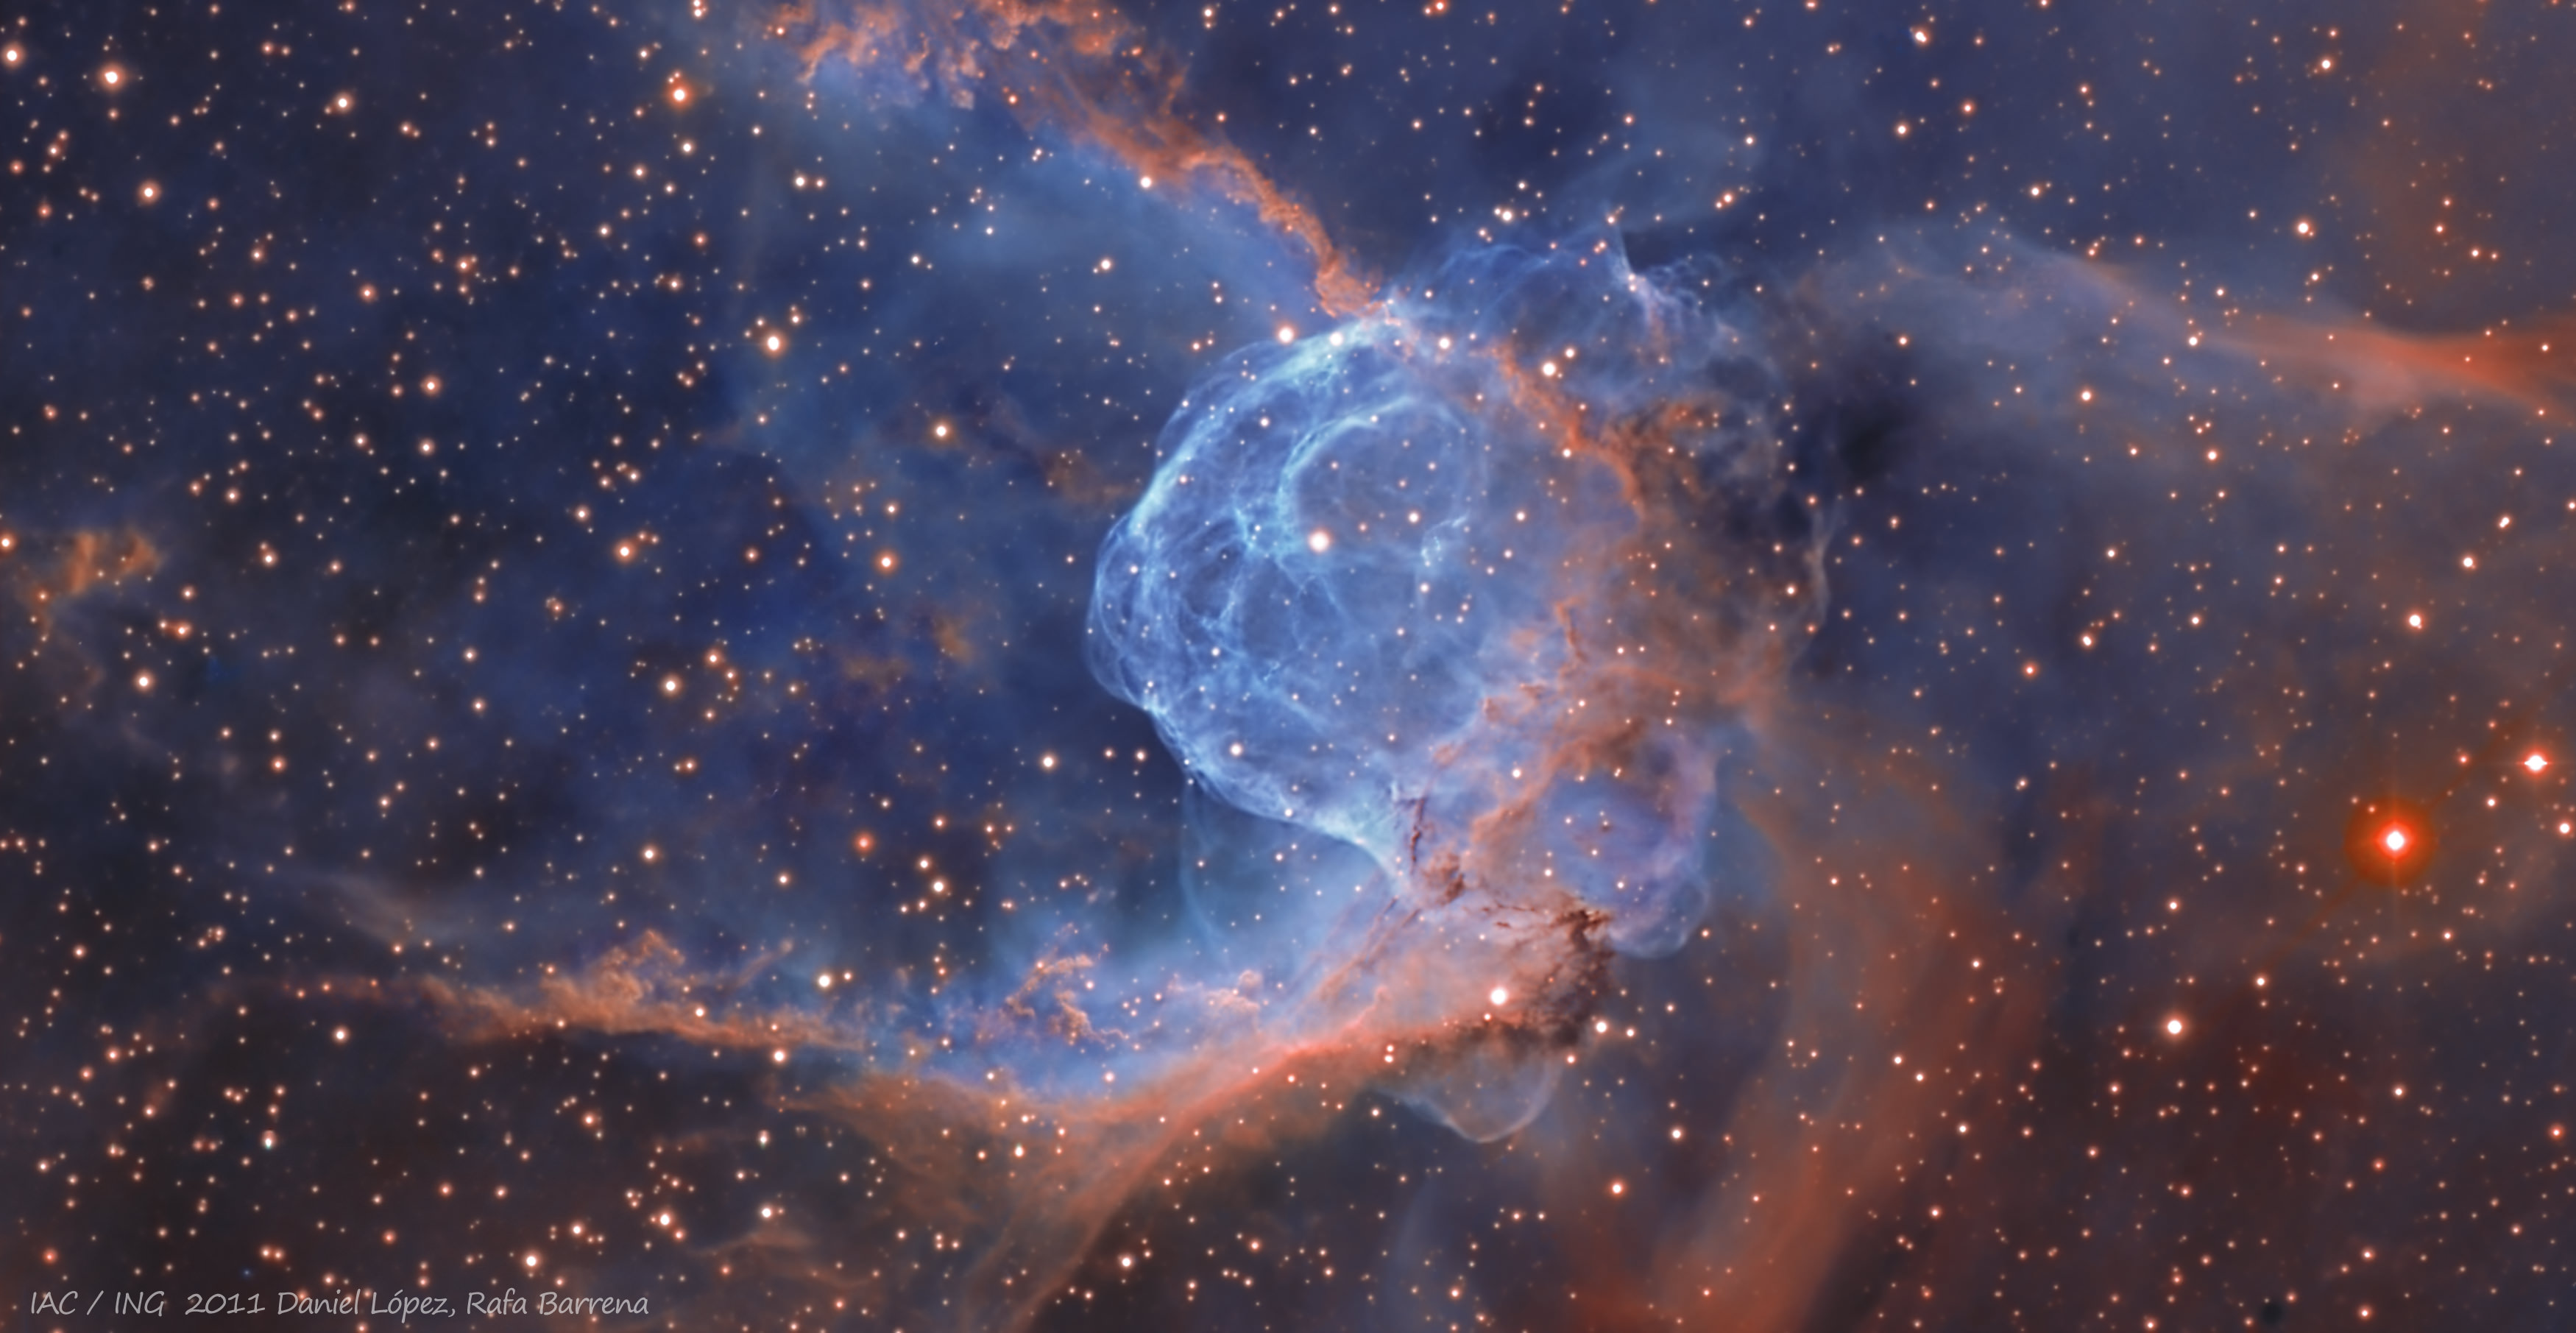
Going to see the new Avengers movie this weekend, either for the first or fortieth time? You may not see much of Thor’s helmet in the film (as he opts for more of a “Point Break” look) but astronomers using the Isaac Newton Group of telescopes on the Canary Islands have succeeded in spotting it… in this super image of the Thor’s Helmet nebula!
Named for its similarity to the famous horned Viking headgear (seen horizontally), the Thor’s Helmet nebula is a Wolf-Rayet structure created by stellar winds from the star seen near the center blowing the gas of the bluish “helmet” outwards into space via pre-supernova emissions.
The colors of the image above, acquired with the ING’s Isaac Newton Telescope, correspond to light emitted in hydrogen alpha, doubly-ionised oxygen and single-ionised sulfur wavelengths.
Super-sized for the thunder god himself, Thor’s Helmet measures at about 30 light-years across. It’s located in the constellation Canis Major, approximately 15,000 light-years from Earth. (You’d think Thor would have left his favorite accessory in a more convenient location… I suspect Loki may be behind this.)
Astronomers, assemble!
Read more about this and see other images from the ING telescopes here.
The Isaac Newton Group of Telescopes (ING) is owned by the Science and Technology Facilities Council (STFC) of the United Kingdom, and it is operated jointly with the Nederlandse Organisatie voor Wetenschappelijk Onderzoek (NWO) of the Netherlands and the Instituto de Astrofísica de Canarias (IAC) of Spain. The telescopes are located in the Spanish Observatorio del Roque de los Muchachos on La Palma, Canary Islands, which is operated by the Instituto de Astrofísica de Canarias (IAC).
Beautiful, Glowing Dust in Orion
[/caption]
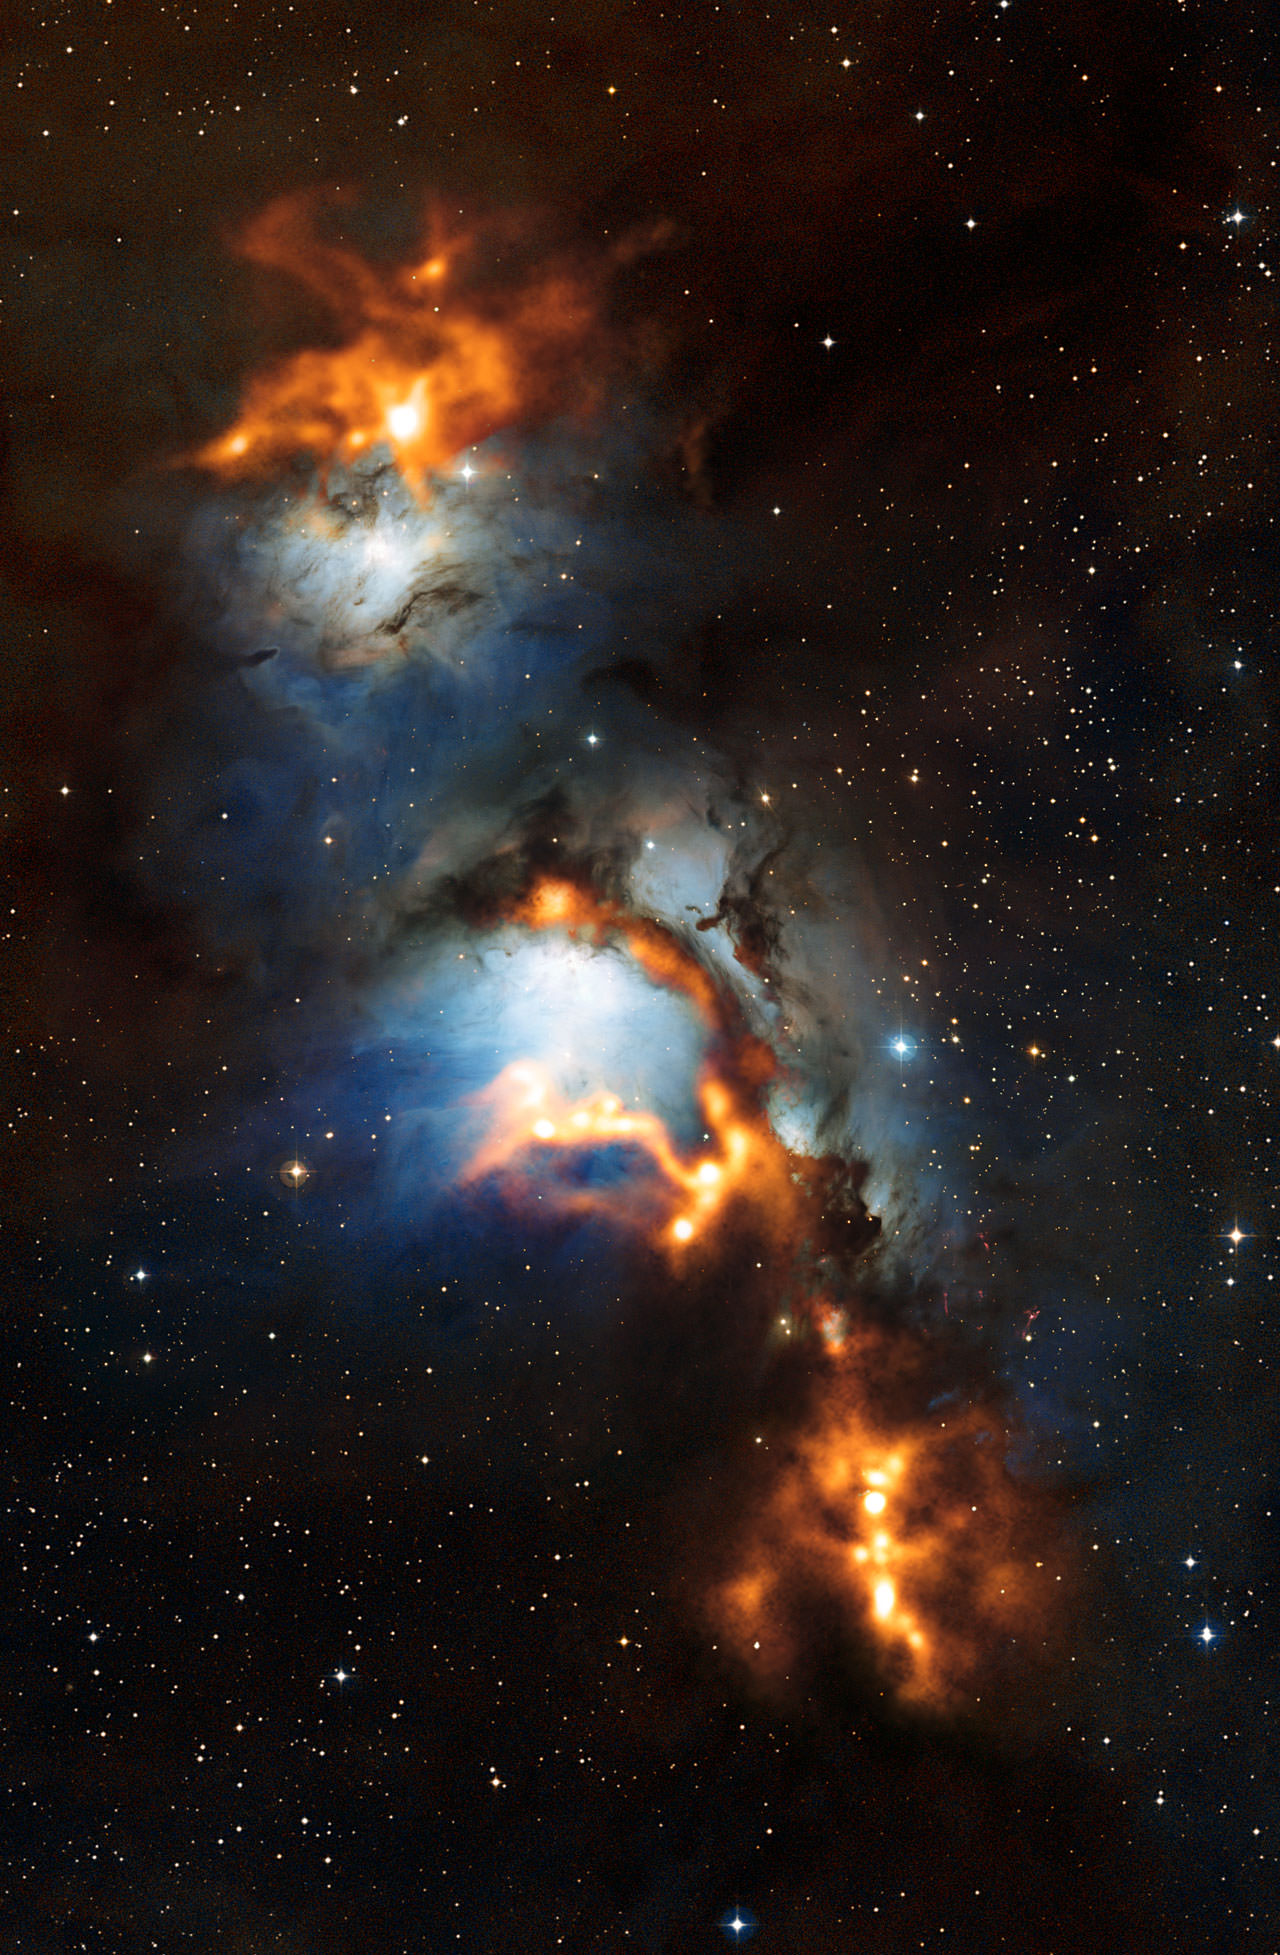
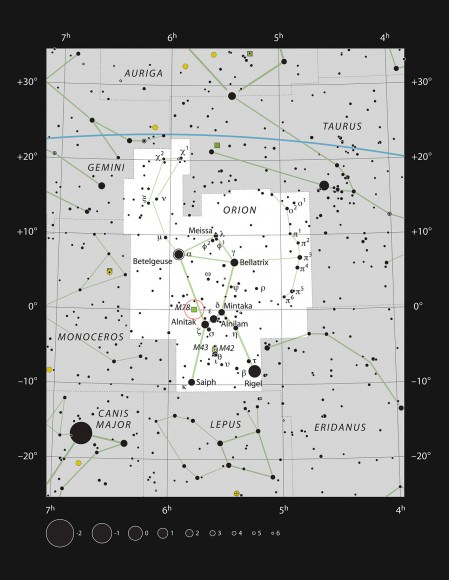
On Earth, dust can be pretty mundane. But in space, dust can be beautiful, especially when the dust reflects starlight – and even more so when we have the chance to see the reflections in different wavelengths. Here in NGC 2068, also called Messier 78, this dazzling submillimetre-wavelength view from the Atacama Pathfinder Experiment (APEX) telescope Dust shows the glow of interstellar dust grains, pointing the way to where new stars are being formed.
This reflection nebula lies just to the north of Orion’s Belt. When seen in visible light glimmers in a pale blue glow of starlight, but much of the light is blocked by the dust. In this image, the APEX observations are overlaid on the visible-light image in orange. APEX’s view reveals the gentle glow of dense cold clumps of dust, some of which are even colder than -250 C.
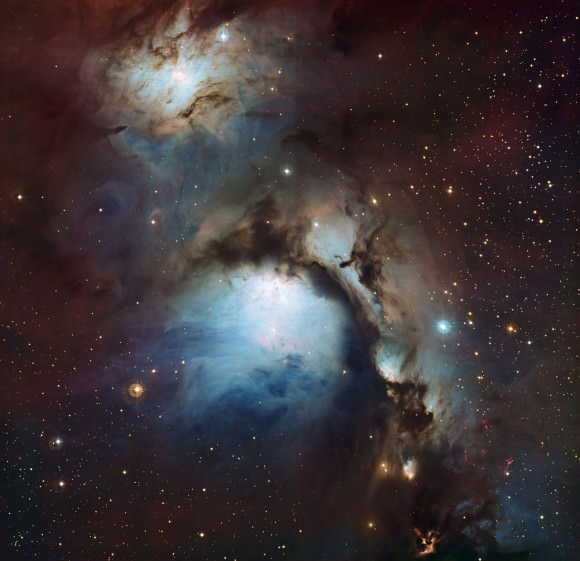
Compare the new image with this earlier, visible light image of M78.
One filament seen by APEX appears in visible light as a dark lane of dust cutting across Messier 78. This tells us that the dense dust lies in front of the reflection nebula, blocking its bluish light. Another prominent region of glowing dust seen by APEX overlaps with the visible light from Messier 78 at its lower edge. The lack of a corresponding dark dust lane in the visible light image tells us that this dense region of dust must lie behind the reflection nebula.
Observations of the gas in these clouds reveal gas flowing at high velocity out of some of the dense clumps. These outflows are ejected from young stars while the star is still forming from the surrounding cloud. Their presence is therefore evidence that these clumps are actively forming stars.
At the top of the image is another reflection nebula, NGC 2071. While the lower regions in this image contain only low-mass young stars, NGC 2071 contains a more massive young star with an estimated mass five times that of the Sun, located in the brightest peak seen in the APEX observations.
Source: ESO
Behind the Scenes of SOFIA – The World’s Most Remarkable Observatory
[/caption]
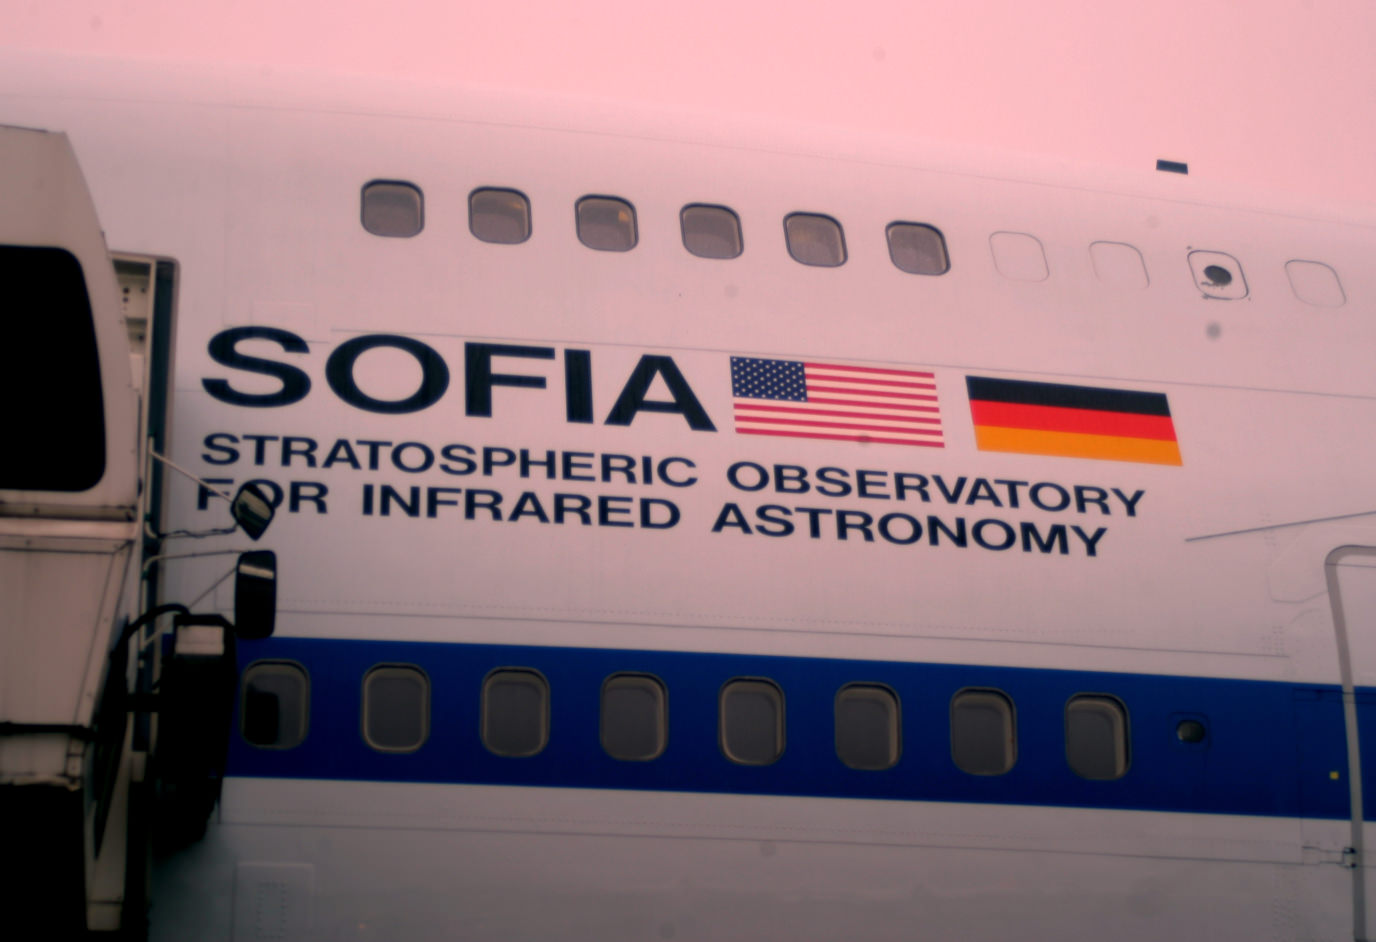
One of the most remarkable observatories in the world does its work not on a mountaintop, not in space, but 45,000 feet high on a Boeing 747. Nick Howes took a look around this unique airliner as it made its first landing in Europe.
SOFIA (Stratospheric Observatory for Infrared Astronomy) came from an idea first mooted in the mid-1980s. Imagine, said scientists, using a Boeing 747 to carry a large telescope into the stratosphere where absorption of infrared light by atmospheric water molecules is dramatically reduced, even in comparison with the highest ground-based observatories. By 1996 that idea had taken a step closer to reality when the SOFIA project was formally agreed between NASA (who fund 80 percent of the cost of the 330 million dollar mission, an amount comparable to a single modest space mission) and the German Aerospace Centre (DLR, who fund the other 20 percent). Research and development began in earnest using a highly modified Boeing 747SP named the ‘Clipper Lindburgh’ after the famous American pilot, and where the ‘SP’ stands for ‘Special Performance’.
Maiden test flights were flown in 2007, with SOFIA operating out of NASA’s Dryden Flight Research Center at Edwards Airforce Base in the Rogers Dry Lake in California – a nice, dry location that helps with the instrumentation and aircraft operationally.
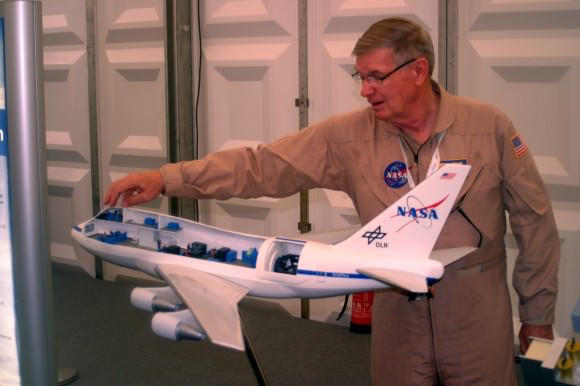
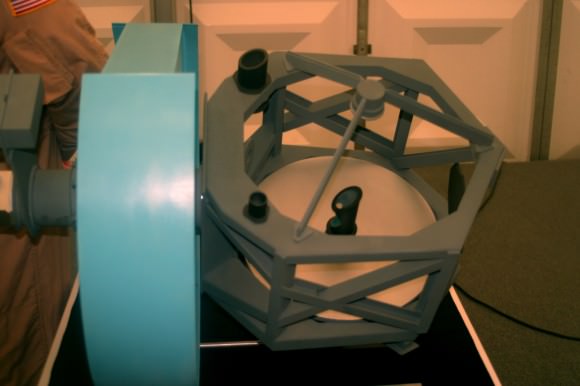
As the plane paid a visit to the European Space Agency’s astronaut training centre in Cologne, Germany, I was given a rare opportunity to look around this magnificent aircraft as part of a European Space ‘Tweetup’ (a Twitter meeting). What was immediately noticeable was the plane’s shorter length to the ones you usually fly on, which enables the aircraft to stay in the air for longer, a crucial aspect for its most important passenger, the 2.7-metre SOFIA telescope. Its Hubble Space Telescope-sized primary mirror is aluminium coated and bounces light to a 0.4-metre secondary, all in an open cage framework that literally pokes out of the side of the aircraft.
As we have seen, the rationale for placing a multi-tonne telescope on an aircraft is that by doing so it is possible to escape most of the absorption effects of our atmosphere. Observations in infrared are largely impossible for ground-based instruments at or near sea-level and only partially possibly even on high mountaintops. Water vapour in our troposphere (the lower layer of the atmosphere) absorbs so much of the infrared light that traditionally the only way to beat this was to send up a spacecraft. SOFIA can fill a niche by doing nearly the same job but at far less risk and with a far longer life-span. The aircraft has sophisticated infrared monitoring cameras to check its own output,and water vapour monitoring to measure what little absorption is occurring.
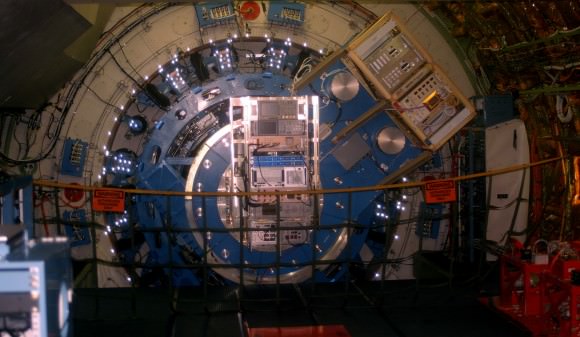
The 2.7-metre mirror (although actually only 2.5-metres is really used in practice,) uses a glass ceramic composite that is highly thermally tolerant, which is vital given the harsh conditions that the aircraft puts the isolated telescope through. If one imagines the difficulty amateur astronomers have some nights with telescope stability in blustery conditions, spare a thought for SOFIA, whose huge f/19.9 Cassegrain reflecting telescope has to deal with an open door to the
800 kilometres per hour (500 miles per hour) winds .Nominally some operations will occur at 39,000 feet (approximately 11,880 metres) rather than the possible ceiling of 45,000 feet (13,700 metres), because while the higher altitude provides slightly better conditions in terms of lack of absorption (still above 99 percent of the water vapour that causes most of the problems), the extra fuel needed means that observation times are reduced significantly, making the 39,000
feet altitude operationally better in some instances to collect more data. The aircraft uses a cleverly designed air intake system to funnel and channel the airflow and turbulence away from the open telescope window, and speaking to the pilots and scientists, they all agreed that there was no effect caused by any output from the aircraft engines as well.
Staying cool
The cameras and electronics on all infrared observatories have to be maintained at very low temperatures to avoid thermal noise from them spilling into the image, but SOFIA has an ace up its sleeve. Unlike a space mission (with the exception of the servicing missions to the Hubble Space Telescope that each cost $1.5 billion including the price of launching a space shuttle), SOFIA has the advantage of being able to replace or repair instruments or replenish its coolant, allowing an estimated life-span of at least 20 years, far longer than any space-based infrared mission that runs out of coolant after a few years.
Meanwhile the telescope and its cradle are a feat of engineering. The telescope is pretty much fixed in azimuth, with only a three-degree play to compensate for the aircraft, but it doesn’t need to move in that direction as the aircraft, piloted by some of NASA’s finest, performs that duty for it. It can work between a 20–60 degree altitude range during science operations. It’s all been engineered to tolerances that make the jaw drop. The bearing sphere, for example, is polished to an accuracy of less than ten microns, and the laser gyros provide angular increments of 0.0008 arcseconds. Isolated from the main aircraft by a series of pressurised rubber bumpers, which are altitude compensated, the telescope is almost completely free from the main bulk of the 747, which houses the computers and racks that not only operate the telescope but provide the base station for any observational scientists flying with the plane.
PI in the Sky
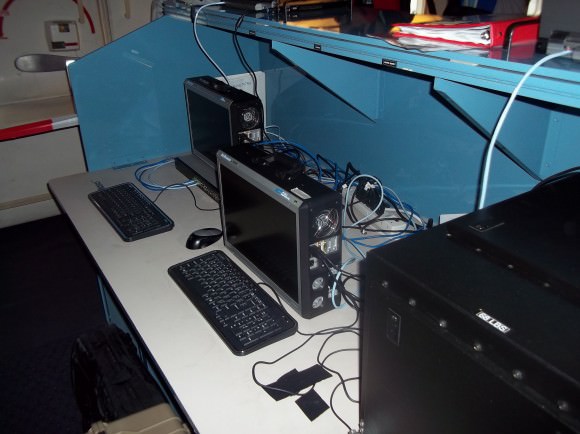
The Principle Investigator station is located around the mid-point of the aircraft, several metres from the telescope but enclosed within the plane (exposed to the air at 45,000 feet, the crew and scientists would otherwise be instantly killed). Here, for ten or more hours at a time, scientists can gather data once the door opens and the telescope is pointing at the target of choice, with the pilots following a precise flight path to maintain both the instrument pointing accuracy and also to best avoid the possibility of turbulence. Whilst ground-based telescopes can respond quickly to events such as a new supernova, SOFIA is more regimented in its science operations and, with proposal cycles over six months to a year, one has to plan quite accurately how best to observe an object.
Forecasting the future
Science operations started in 2010 with FORCAST (Faint Object Infrared Camera for Sofia Telescope) and continued into 2011 with the GREAT (German Receiver for Astronomy at Teraherz Frequencies) instrument. FORCAST is a mid/far infrared instrument working with two cameras between at five and forty microns (in tandem they can work between 10–25 microns) with a 3.2 arcminute field-of-view. It saw first light on Jupiter and the galaxy Messier 82, but will be working on imaging the galactic centre, star formation in spiral and active galaxies and also looking at molecular clouds, one of its primary science goals enabling scientists to accurately determine dust temperatures and more detail on the morphology of star forming regions down to less than three-arcsecond resolution (depending on the wavelength the instrument works at). Alongside this, FORCAST is also able to perform grism (i.e. a grating prism) spectroscopy, to get more detailed information on the composition of objects under view. There is no adaptive optics system, but it doesn’t need one for the types of operations it’s doing.
FORCAST and GREAT are just two of the ‘basic’ science operation instruments, which also include Echelle spectrographs, far infrared spectrometers and high resolution wideband cameras, but already the science team are working on new instruments for the next phase of operations. Instrumentation switch over, whilst complex, is relatively quick (comparable to the time it takes to switch instruments on larger ground observatories), and can be achieved in readiness for observations, which the plane aims to do up to 160 times per year. And whilst there were no firm plans to build a sister ship for SOFIA, there have been discussions among scientists to put a larger telescope on an Airbus A380.
Sky Outreach
With a planned science ambassador programme involving teachers flying on the aircraft to do research, SOFIA’s public profile is going to grow. The science output and possibilities from instruments that are constantly evolving, serviceable and improvable every time it lands is immeasurable in comparison to space missions. Journalists had only recently been afforded the opportunity to visit this remarkable aircraft, and it was a privilege and honour to be one of the first people to see it up close. To that end I wish to thank ESA and NASA for the invitation and chance to see something so unique.
Polar Telescope Casts New Light On Dark Energy And Neutrino Mass
[/caption]
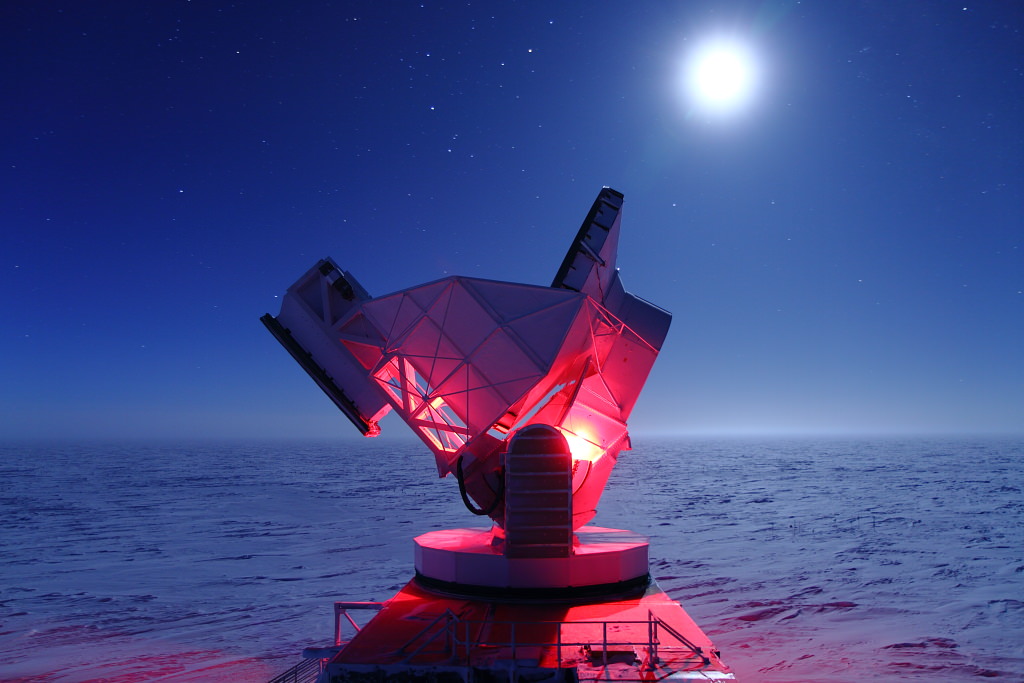
Located at the southermost point on Earth, the 280-ton, 10-meter-wide South Pole Telescope has helped astronomers unravel the nature of dark energy and zero in on the actual mass of neutrinos — elusive subatomic particles that pervade the Universe and, until very recently, were thought to be entirely without measureable mass.
The NSF-funded South Pole Telescope (SPT) is specifically designed to study the secrets of dark energy, the force that purportedly drives the incessant (and apparently still accelerating) expansion of the Universe. Its millimeter-wave observation abilities allow scientists to study the Cosmic Microwave Background (CMB) which pervades the night sky with the 14-billion-year-old echo of the Big Bang.
Overlaid upon the imprint of the CMB are the silhouettes of distant galaxy clusters — some of the most massive structures to form within the Universe. By locating these clusters and mapping their movements with the SPT, researchers can see how dark energy — and neutrinos — interact with them.
“Neutrinos are amongst the most abundant particles in the universe,” said Bradford Benson, an experimental cosmologist at the University of Chicago’s Kavli Institute for Cosmological Physics. “About one trillion neutrinos pass through us each second, though you would hardly notice them because they rarely interact with ‘normal’ matter.”
If neutrinos were particularly massive, they would have an effect on the large-scale galaxy clusters observed with the SPT. If they had no mass, there would be no effect.
The SPT collaboration team’s results, however, fall somewhere in between.
Even though only 100 of the 500 clusters identified so far have been surveyed, the team has been able to place a reasonably reliable preliminary upper limit on the mass of neutrinos — again, particles that had once been assumed to have no mass.
Previous tests have also assigned a lower limit to the mass of neutrinos, thus narrowing the anticipated mass of the subatomic particles to between 0.05 – 0.28 eV (electron volts). Once the SPT survey is completed, the team expects to have an even more confident result of the particles’ masses.
“With the full SPT data set we will be able to place extremely tight constraints on dark energy and possibly determine the mass of the neutrinos,” said Benson.
“We should be very close to the level of accuracy needed to detect the neutrino masses,” he noted later in an email to Universe Today.
Such precise measurements would not have been possible without the South Pole Telescope, which has the ability due to its unique location to observe a dark sky for very long periods of time. Antarctica also offers SPT a stable atmosphere, as well as very low levels of water vapor that might otherwise absorb faint millimeter-wavelength signals.
“The South Pole Telescope has proven to be a crown jewel of astrophysical research carried out by NSF in the Antarctic,” said Vladimir Papitashvili, Antarctic Astrophysics and Geospace Sciences program director at NSF’s Office of Polar Programs. “It has produced about two dozen peer-reviewed science publications since the telescope received its ‘first light’ on Feb. 17, 2007. SPT is a very focused, well-managed and amazing project.”
The team’s findings were presented by Bradford Benson at the American Physical Society meeting in Atlanta on April 1.

